Ultimate Guide to Trigger Pointing
Target Body Part
From your feet to your forehead, we have a lot of trigger points.
Trigger points are tight knots in your muscles. They form when muscle fibers get stuck in a contracted position due to stress, overuse, poor posture, or injury.
And if you don’t do anything to get any myofascial release, they will get worse and lead to chronic issues down the line.
So let’s reverse that and get you pain free.
General Trigger Pointing How To (READ FIRST)
There are three broad ways that you can trigger point:
Pressure/Pin
This is when you simply apply weight or force into the tool you are using to calm down the muscle.
This can be enhanced through contraction and stretching while “pinning” the muscle with constant force!
I will walk you through examples down below.
Pin and stretch
This technique builds on top of the pressure technique.
You will find that after you pin a muscle, moving that muscle into a stretched state will increase the intensity of the trigger point.
This ultimately can lead to better outcomes, as long as you are not pushing yourself through too much pain!
Roll with the “belly”
This is best visualized by the person that is rolling out their legs. They roll up and down their legs along “the belly” or main section of the tissue where all the muscle is.
Roll across the “belly”
Understanding the direction of the muscle helps us “roll out” much more effectively. Rolling across a muscle perpendicular to the way it contracts is a great way to break up muscle adhesions and get pressure from all sides of a muscle.
Bare Essentials (tools for trigger point)
Here are the things I use most often. The comprehensive list of all the tools on the market is also a good resource if you want to go the extra mile. But these will get you 90% of the way there!
-golf ball (foot specific)
-Tennis ball/Lacrosse ball (total body relief)
-Soft Ball (large muscle trigger pointing)
-foam roller/PVC pipe
–Thera Cane (highly recommend for back, hip-flexor, neck and trapezius pain)
Okay, that’s enough important general info. Let’s fix your body.
Trigger Point Your Foot
Tools I like to use:
Lacrosse ball, Golf ball
…
I use my feet… A lot. And they get tired. That’s why I trigger point on my feet daily.
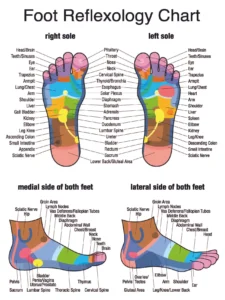
There are a lot of resources on foot reflexology out there, but here is a quick way to find your foot trigger points for yourself!
Using A Lacrosse Ball
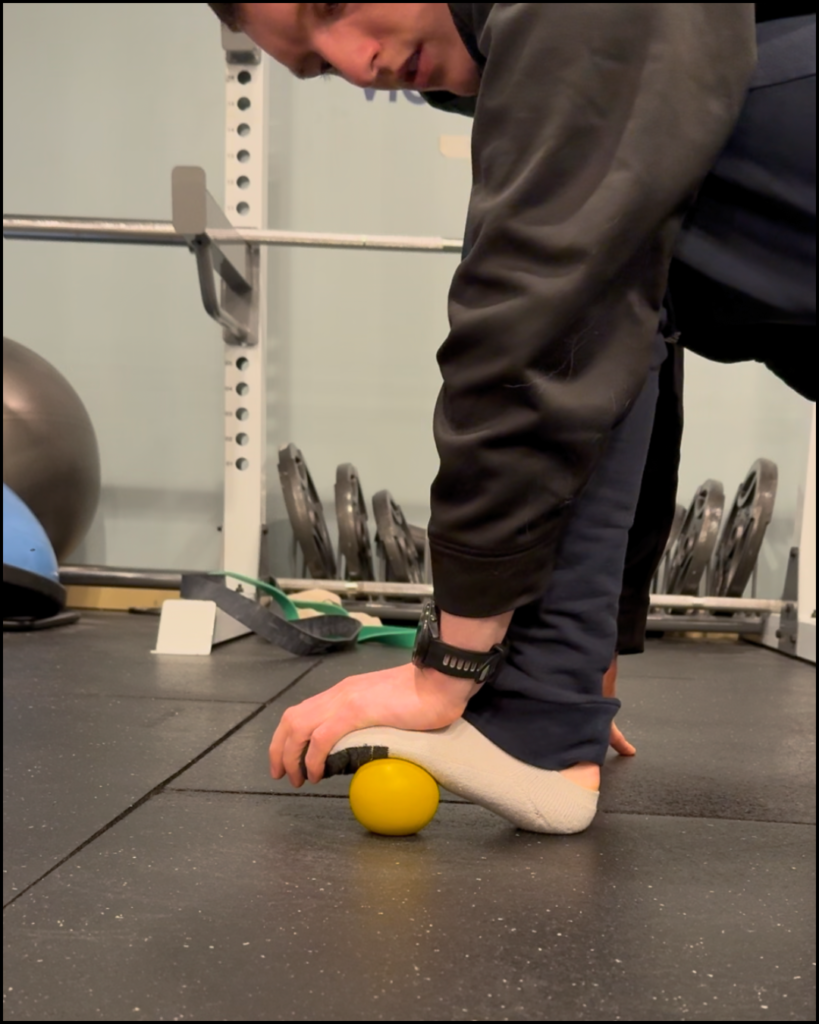
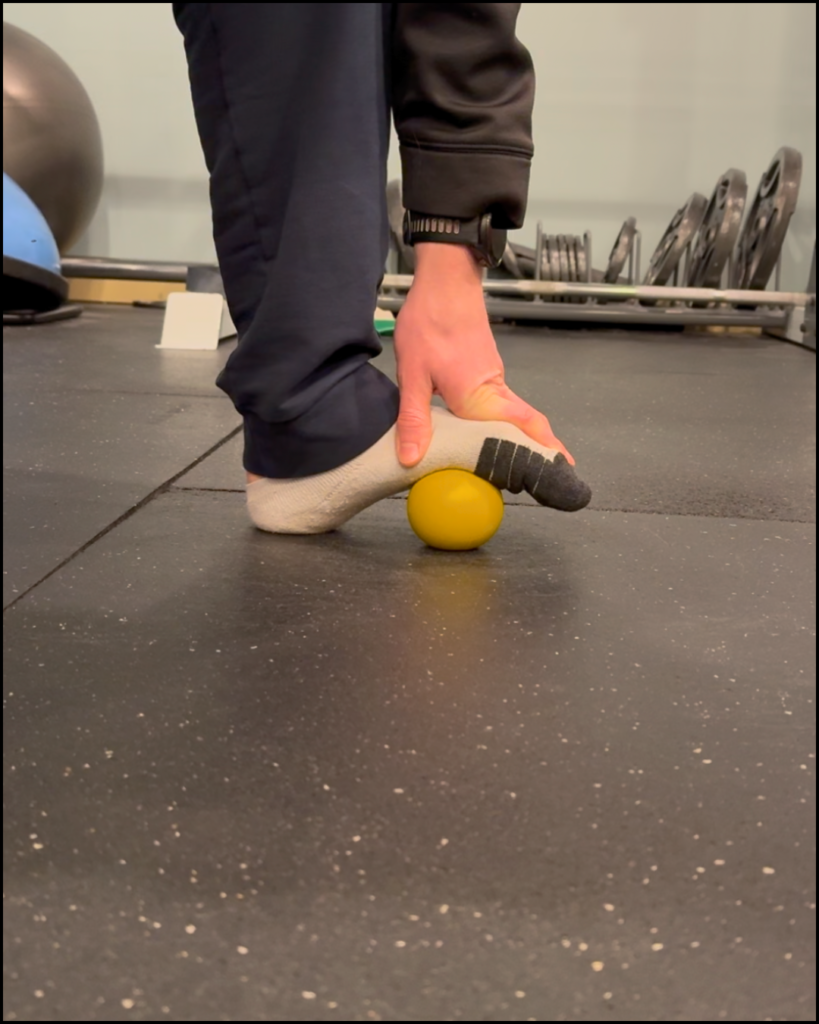
Take a lacrosse ball or anything firm enough to add pressure to your foot and roll along the foot muscles until you find a spot that is tighter than the others.
You’ll know when you hit a trigger point.
I like to roll around slowly along the muscles, and then across the muscles, kind of like strumming a guitar string.
When you find a spot that is the highest source of pain, rest on it and apply a little extra pressure. This will make the muscle calm down and open up muscle adhesions.
You can trigger point your feet sitting down in a chair, but I prefer to sit on the ground like this video, that way I can adjust the ball with my hands too.
Using a lacrosse ball will spread out the force and it won’t feel quite as pin-pointed as a golf ball, but that may be what you’re looking for.
Hold a trigger point for 20-30 seconds and then stretch that muscle for another 20 seconds minimum. Repeat in the same spot or move onto the next trigger point.

Trigger Pointing Your Calves
 Tools I like to use:
Foam Rollers, Lacrosse ball
…
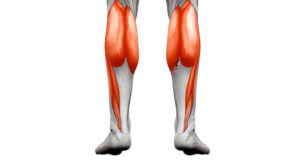
If your nemesis is that calf tightness you feel every day, I’ve got you covered.
Calf Foam Rolling Protocol
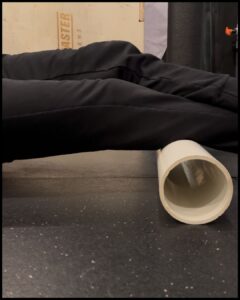
Starting at the ankle, I like to rotate side to side and up and down at the same time. Switching the pace and direction helps to locate the tender areas.
There are a lot of deep calf muscles that rarely get any relief and this will help those immensely.
As you roll and come across tender spots, take a moment to rest on those areas without moving.
Bonus points if you cross your leg on top of the leg being worked on. This will add extra pressure to get deeper in the muscle.
The last thing you need to do here is add some ankle movement to get the tissue firing underneath all the pressure. Compressed movement helps to restore the fascia and muscle tissue back to good form and reduces the adhesions that have built up.
As you work your way from your ankle up to the popliteal fossa behind your knee, you will come across some areas that may need more focus.
Using a ball will help focus the force you can apply to the muscle.
Pin-Point Calf Trigger Techniques
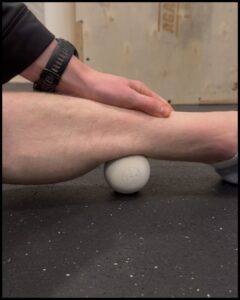
As you’ll see in my calf youtube video, you can use a ball to really break up your calf tightness.
Here’s what to do.
- Pin the muscle right at the adhesion point (aka, where the most pain is)
- Stretch the muscle by extending the joint that is closest to that point.
For example: When I pin a spot on my lower calf, I start with my toes down in a neutral and relaxed position. Once it is pinned, I can pull my toes up, dorsiflexing my ankle, in order topull the pinned tissue into a stretched state!
- Reset the ball and do it again. Repeating this motion is vital to get the knots and adhesions out!
Practice rolling with the belly and across the belly of the muscle to find the tight sections of muscle that require the most trigger pointing.
After you trigger point your calf, make sure you hop on a slant board and stretch your calf!
In order for the trigger pointing to take full effect, you have to integrate it into a stretch and movement.
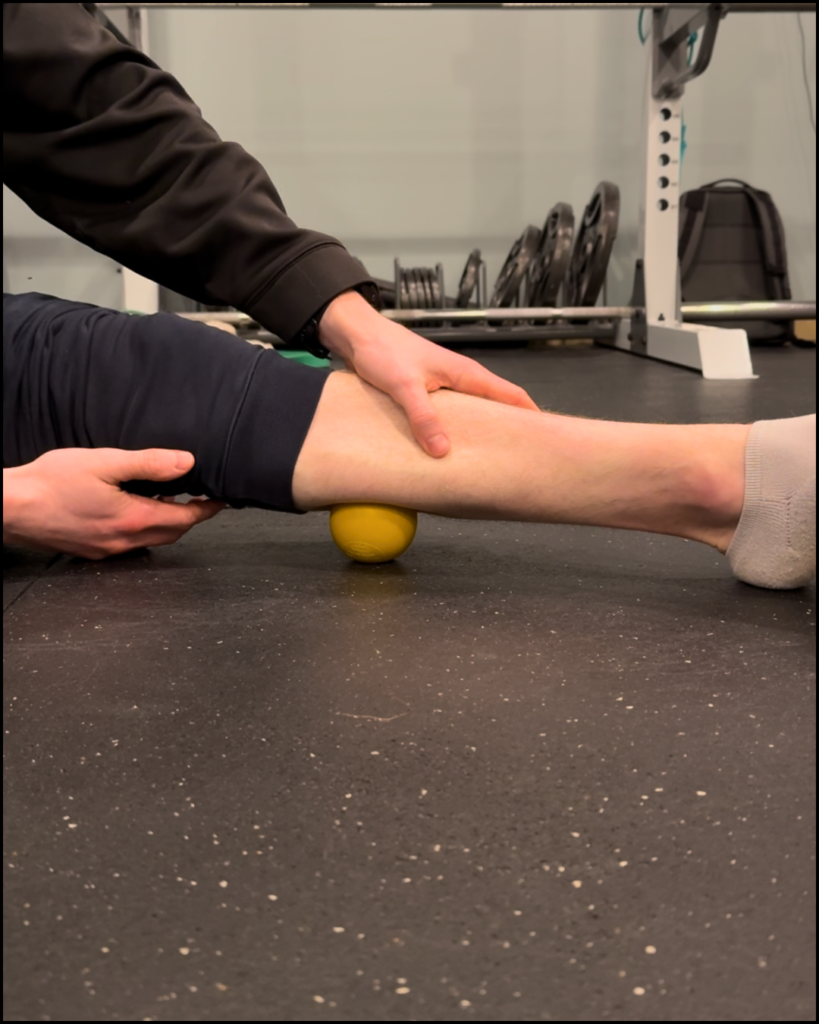
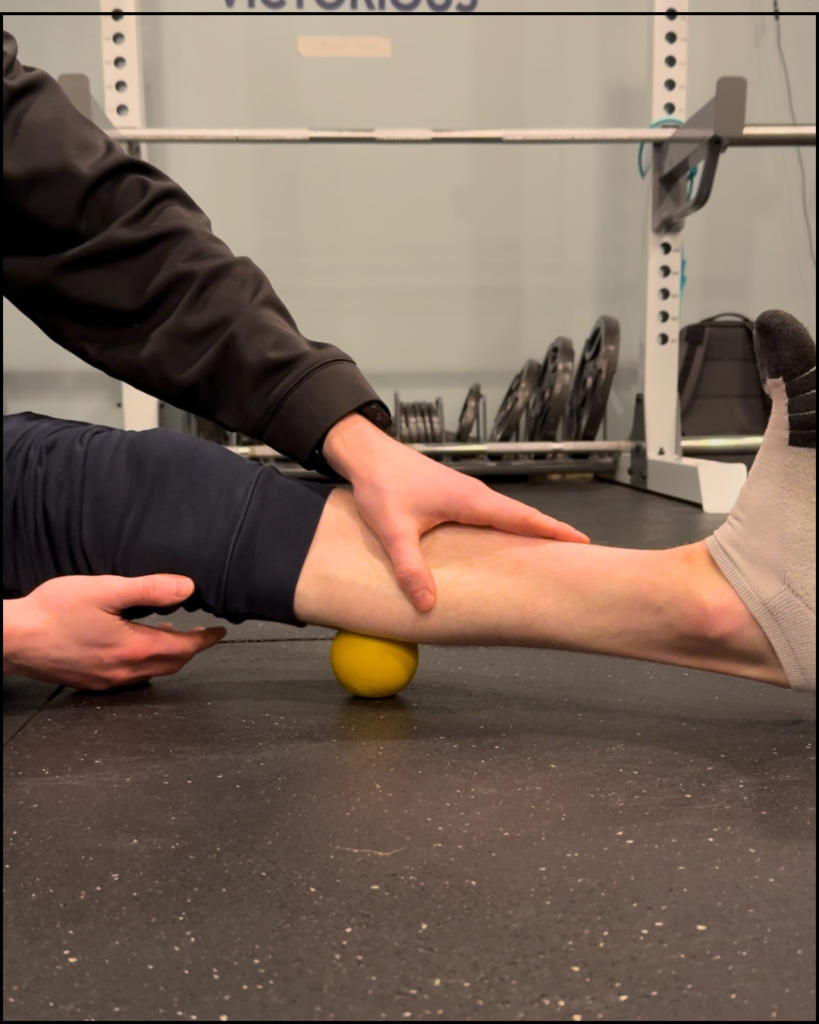
Tibialis Anterior Trigger Point
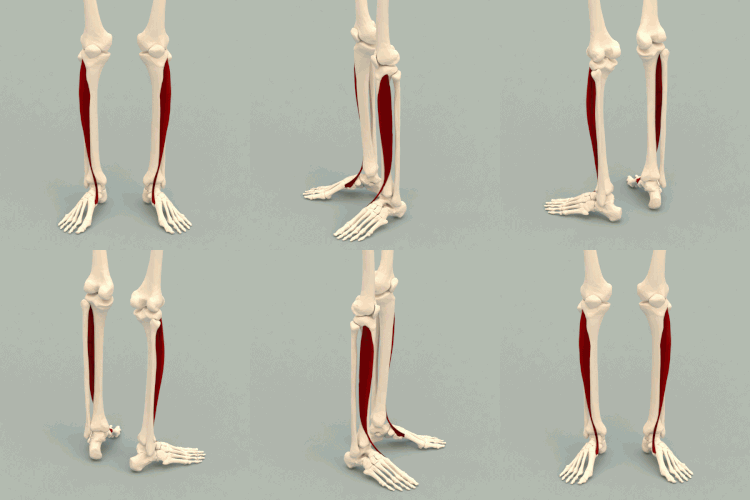 Tools I like to use:
Lacrosse ball
…
I am shocked by the amount of people that don’t stretch or trigger point their Anterior tibialis’
If you get shin splints, then you can solve them with this exercise and stretch sequence.
Pro tip – It also wouldn’t hurt to strengthen them! (coming soon)
Anterior Tibialis Protocol
First things first – Be careful not to hit your bone too much because that will hurt and bruise up.
Also, be aware that if you get too low towards the ankle, you may put too much pressure on tendons and bruise them.
So try and stay in the meaty area of your A-tib!
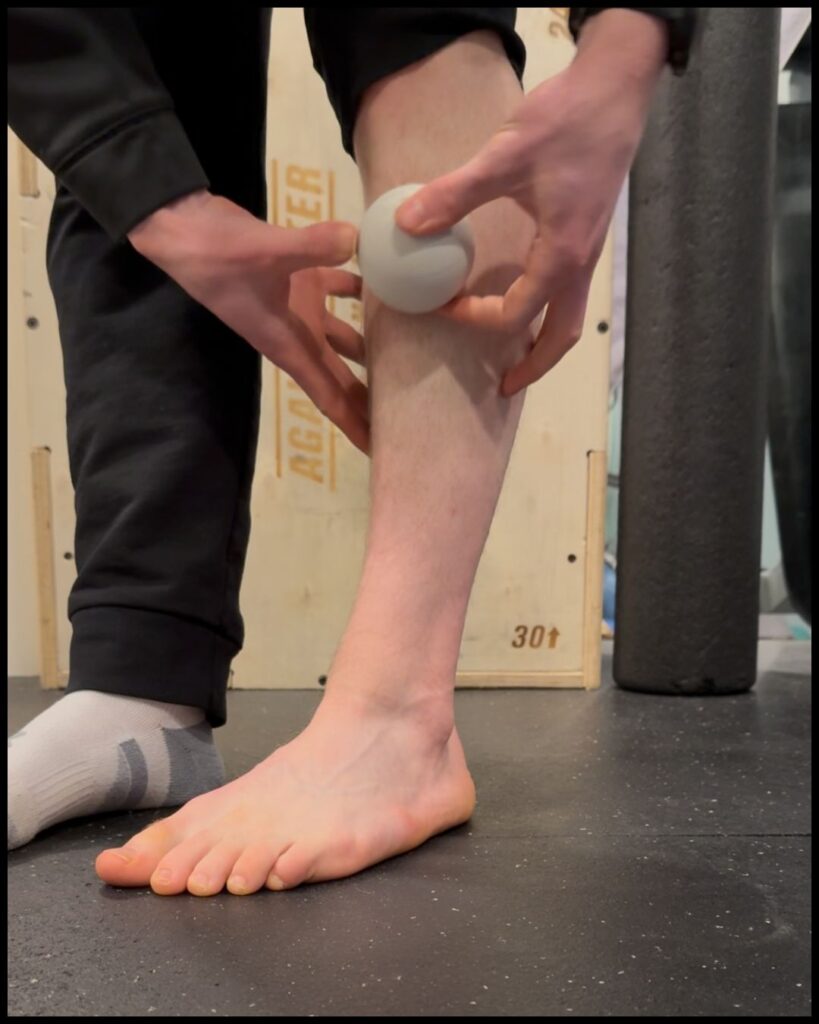
I like to use “along the belly” and “across the belly” techniques for getting my Anterior tibialis to free up and loosen.
Remember you can add force by using your free hand to press down on your leg.
How To Do It
- First roll up and down the muscle to find any tender spots
- Next, roll across the muscle from side to side. This is my favorite move to do
Pro tip, you can also use little circles as you go up and down your leg.
- Once you’ve been able to figure out your tightest areas on the muscle, trigger point the most tender spots, adding pressure with your free hand where you see fit for about 15-20 seconds.
- Finally stretch your Anterior Tibialis with the toe point stretch!
Repeat a few times and you’ll feel immediate relief in your shins.
Hamstring Muscle Trigger Point

Tools I like to use:
Lacrosse ball, Foam Roller, PVC pipe
…
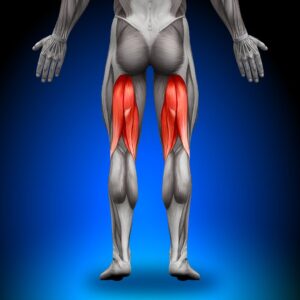
The Hamstrings are an interesting group of muscles that often get overlooked in their everyday life roles.
Did you know that 10% of collegiate sports injuries are related to hamstrings!
This shows us the importance of keeping bulletproof hamstrings and trigger pointing your hamstrings is a vital part of the process.
This Hamstring Trigger Point protocol, along with stretching and targeting strength exercises, will make your hamstrings immune to injury.
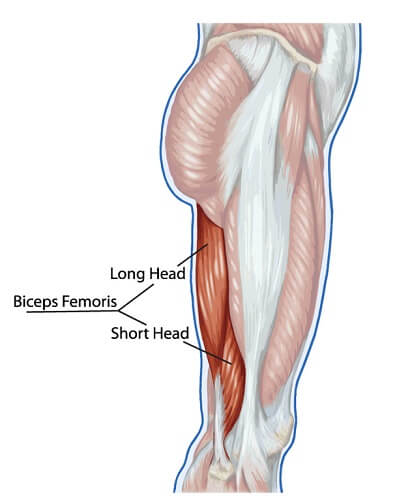
Before we go over how to do it, I want you to understand they attach down below the backside of the knee and insert on the pelvis on the medial side of the hip socket.
Remember that as you trigger point so you stay on the muscle.
Hamstring Foam Rolling & Trigger Point Protocol

There are three techniques I use while trigger pointing my hamstrings
- Foam rolling slides with a crossed leg or hand for added pressure
- Lacrosse ball trigger pointing
- Across the belly lacrosse ball (seated)
- Pin + Stretch
How to do it:
Most people have a hard time rolling the back side of their legs because it is an awkward muscle to get while on top of a foam roller.
You can target the outer hamstring (biceps femoris) by crossing your unused leg on top and rolling methodically up and down the leg. Take notice of the sore spots and pause on the most tender areas to force the muscle to relax.
Target the inner hamstring muscles by rolling to the inside and using your hand to apply extra pressure into your leg.
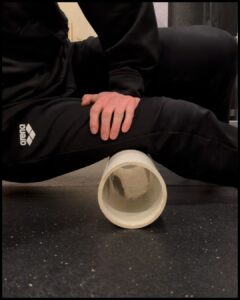
Pro Tip: If a foam Roller is too soft, Buying a Wide PVC pipe from your local home depot will work great!
Remember, most of the meat of a hamstring are around the mid leg and down, but using a lacrosse ball can get deeper into the muscle. Check it out…
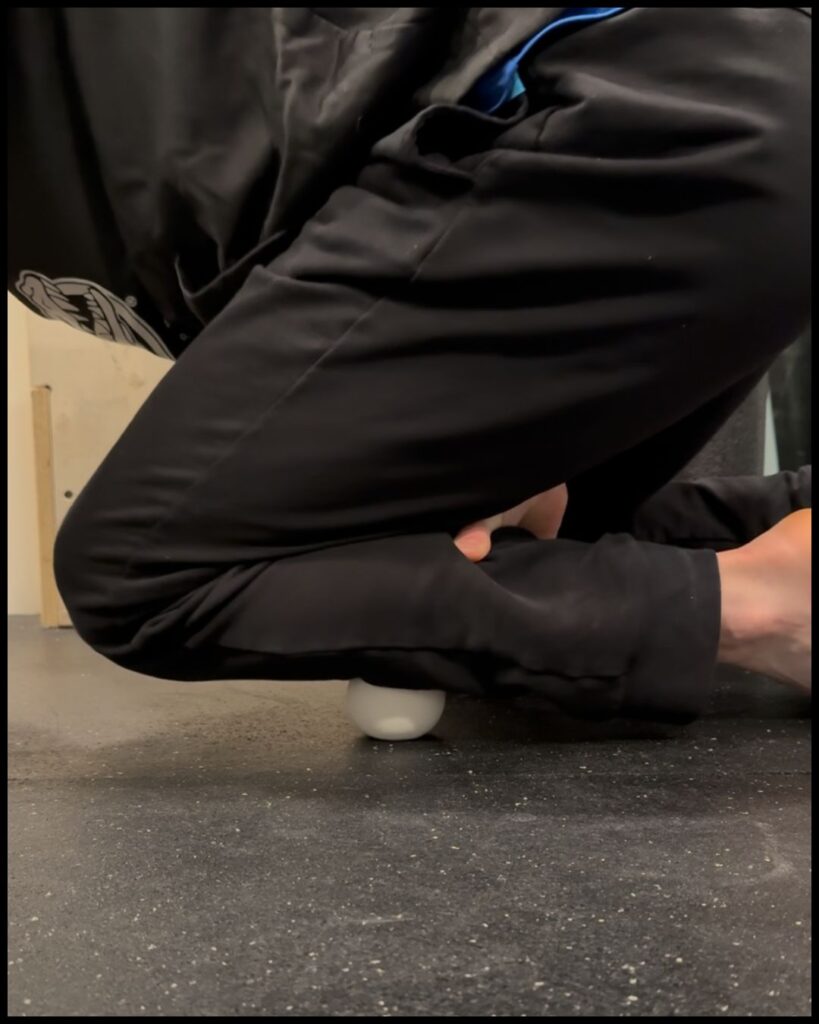
Lacrosse Ball Hamstring Trigger Point
This is my go to hamstring fixer-upper. I’m not joking when I say that this trigger point and stretch immediately helps my hamstrings open up and relax.
Here’s how to do it:
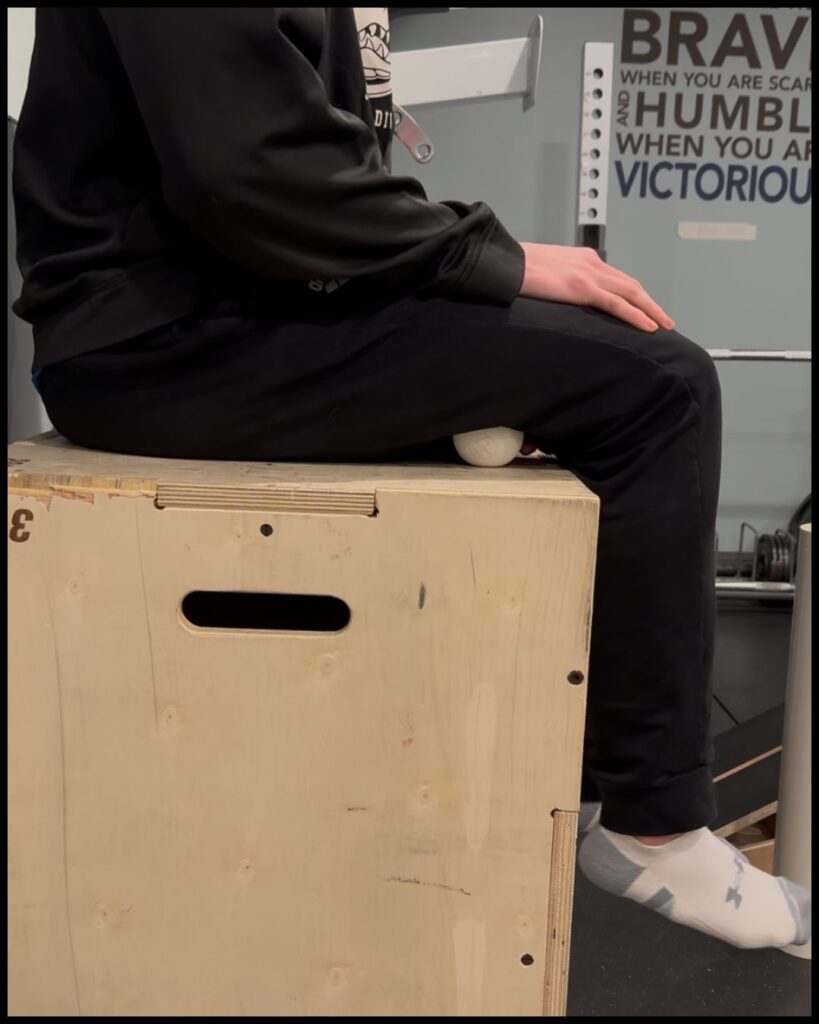
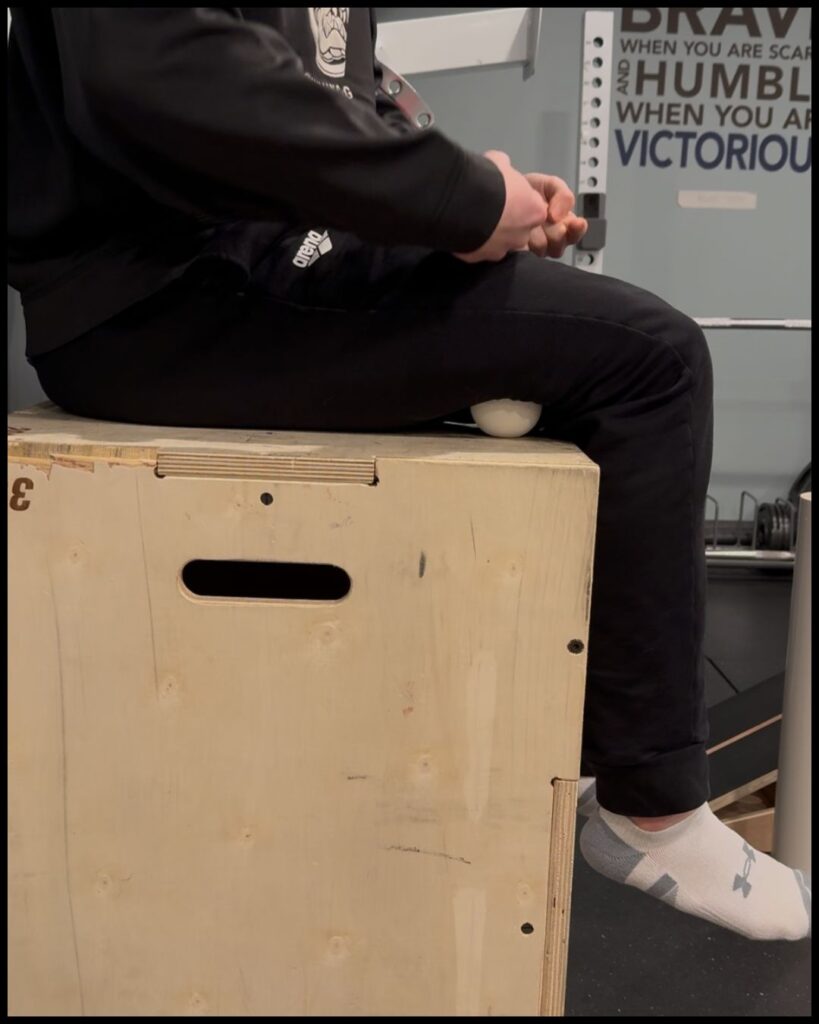
Sit on the edge of a table, counter or if you have a gym available, you can use a box jump like I am in the pictures.
Just make sure your legs can dangle.
From there I like to slide the lacrosse ball under my hamstring all the way down my leg closer to my knee.
Then I do three things… and you’ll recognize it from earlier
- Pressure/Pin – just let the weight of your leg drive the muscle into the ball and breath deeply as the muscle relaxes into a softer and more pliable position.
- Roll across – The hamstrings run vertically up our leg, which means the muscle fibers and sarcomeres (tiny muscle units) are all aligned in the same vertical direction. I like to use the ball to strum across the muscle and fascia like strings on a guitar.
- Pin and stretch – After I have applied pressure to the trigger points all over my hamstrings and rolled across them to slowly massage out all of the adhesions, I go back to the biggest trigger points and apply more pressure while extending my leg.
This puts those muscle fibers in a stretched state to get them all the way opened up.
Make sure you watch the Hamstring Trigger Point video to see exactly what it should look like. And if you still want more, pair this protocol with some deeper stretching from my ultimate stretching guide.
Trigger Point in Your Quad
 Tools I like to use:
Foam rollers, Grid rollers, PVC Pipes, Soft Ball, Lacrosse ball
…
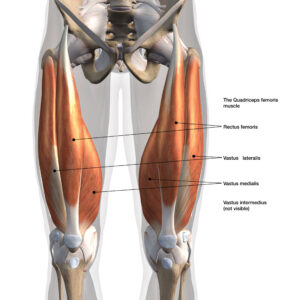
A lot of people (myself included) have quad tightness.
Luckily, trigger pointing your thighs with a foam roller or grid foam roller is very easy. But most people do it wrong.
Let me show you how to get the best results when it comes to your quads!
Most people roll up and down their legs WAY too fast.
This doesn’t let the muscle figure out what you’re trying to do for it. It simply doesn’t have the time to relax into a better state.
By now you understand that there are three amazing ways to use a foam roller or trigger point ball.
Rolling Your Quads
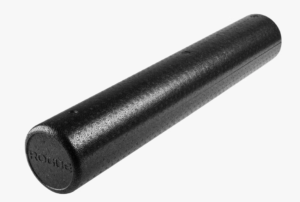
If you have a grid foam roller or normal foam roller, you can roll up and down your legs to find the most tender locations.
When you find a spot that is extra tight or gives you the most discomfort, rest on it and breathe deeply so your body can realign and relax.
Watch this breakdown video below for a great visual on how to do it!
Upgrade your foam rolling experience if the foam rollers you have don’t provide enough pressure. All you have to do is visit your local hardware store and pick up a thick PVC pipe!.
A PVC Pipe is one of my favorite Quad and hamstring upgrades that will last forever (and it’s super cheap)!


Trigger Point Techniques For Deep Quad
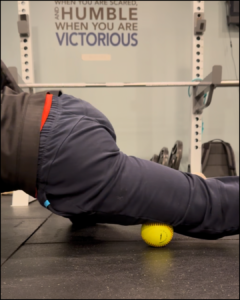
I was shocked to learn how deep the quad muscles can go. Depending on your muscle mass, you can have a lot of meat on that femur of yours.
That’s why it is important to penetrate deeply to get all the muscle adhesions broken up when trigger pointing.
I like to use a softball because it elevates my body off the ground a bit higher than a lacrosse ball does.
I move across the belly, up and down the muscles to find the spots that flare up. Then After I go over all 4 of my quad muscles, I go back to the worst spots and do this next move:
Pin and Stretch
It’s pretty straight forward…
Pin: Get directly on top of that trigger point and push it in so you feel that low to medium intensity burning sensation.`
Stretch: use your hamstrings to pull your heel up to your butt. This will force the quad muscle to stretch while being pressured at the same time.
There’s no better way to trigger point your thigh and break up adhesions than that technique right there!


How To Trigger Point Your Vastus Lateralis
People often complain about their IT band hurting, but really the issue is in 1 of 2 places.
The Vastus Lateralis is the quadricep muscle furthest to the outside of your leg. I like to use the same techniques we went over already to pin the muscle, go across the belly and stretch the muscle while it is pinned.
It really breaks up that tissue and can relieve the tension you may be feeling.
The second way to break up that IT band issue is part of our Hip section below!
Trigger Pointing For Your Glutes - Piriformis Release, External Rotators
Tools I like to use:
Lacrosse ball, Tennis ball
…
Are you suffering from hip pain, glute pain or sciatica and this is the first time hearing about trigger point therapy that you can do yourself for relieving your own pain? 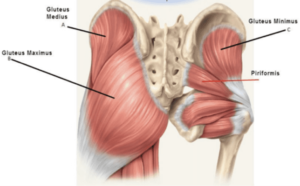
Well, this won’t be the quickest fix, but I promise you’ll feel better in about 15 minutes.
First, you have to understand that there are quite a few layers of glute muscles and most people have weak glutes from sitting all the time.
Weak and tight is a bad combination.
So let’s identify your pain points first, if you can sit in a figure 4 that is great, but not 100% necessary.
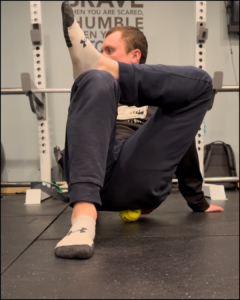
Start with a tennis ball on the ground and place it under your glute.
There are areas you’ll want to avoid too much pressure on, there are nerves so be aware that if you go too hard in these spots you can get a shooting pain.
If that does happen, that is okay, just try to avoid that area so deeply again!
Large Glute Trigger Points Minimus, Medius & Maximus
Using a larger ball will help stay more superficial when you’re targeting your larger glute muscles.
For large glutes, using the pinning technique is best.
The issue is, you have to do the moving to find the best positions to be in. Use this video to see how I move around to target different areas of the glute (or watch below).
Did you notice how I targeted my glute minimus by turning to the side more and moved my leg into different positions to create a more relaxed or tight muscle to work on.
Switching it up will help you locate trigger points more easily.
Pro Tip: When you do find a good one, rest on it for about 30 seconds before moving again.
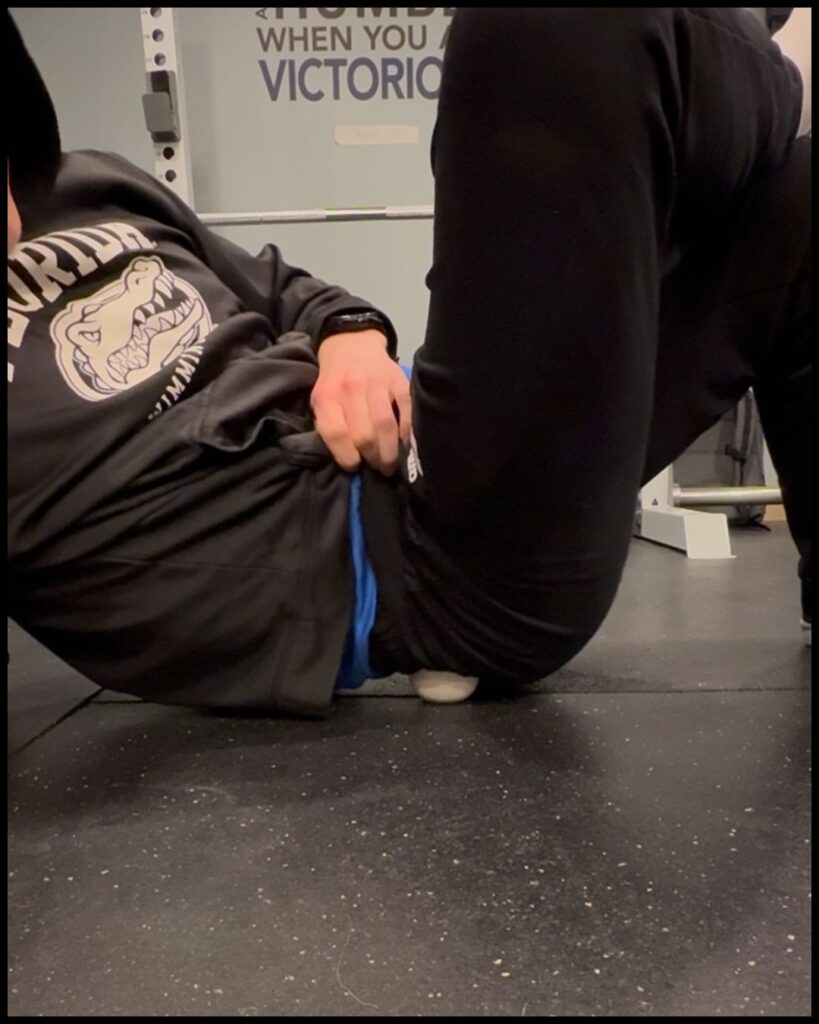
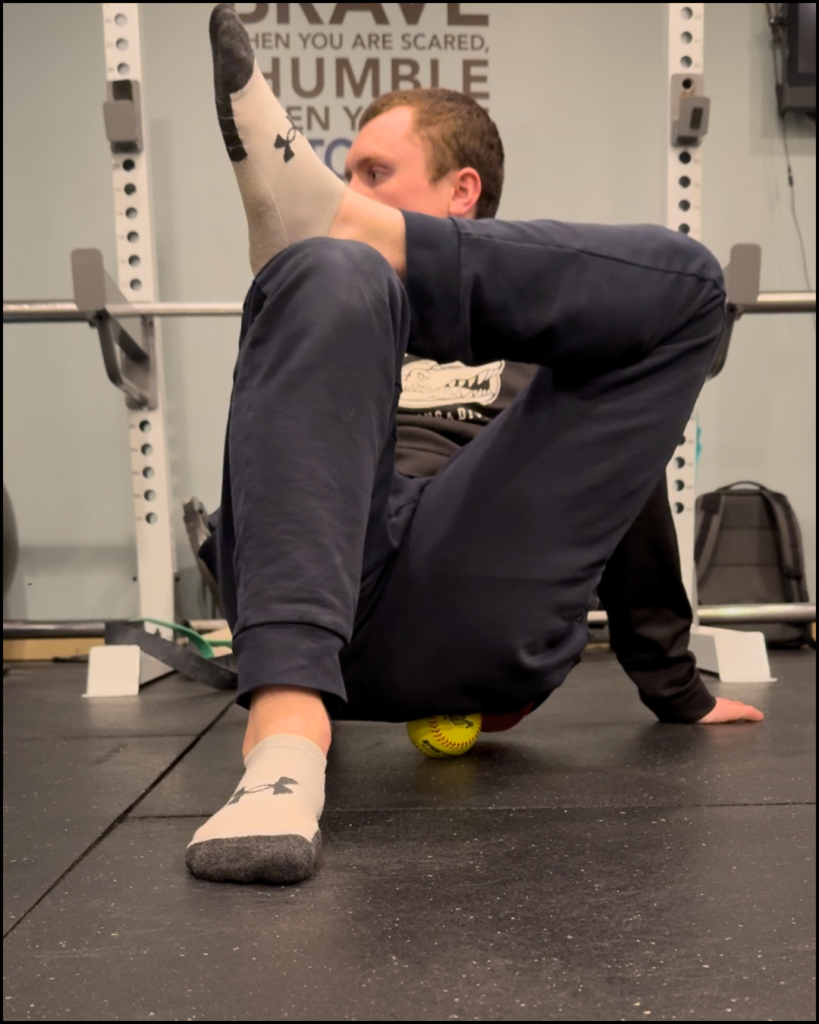
How to Trigger Point your Piriformis For Maximum Relief
Most people couldn’t tell you where your Piriformis is. If you don’t know where it is, how could you possibly fix it.
Well, if you’ve ever gotten a massage, you’ll remember that weird leg rotation trick they use. And if you have a partner that wants to help you, you can use this video to guide you in the beginning
If you don’t have a partner, don’t worry about it. You can use a tennis ball or lacrosse ball to do it yourself. Check it out.
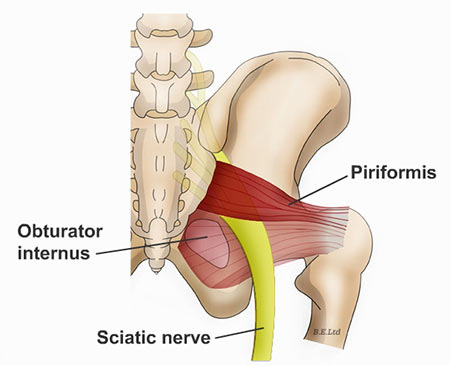
First you have to understand where the muscle is.
The diagram shows the Piriformis, along with the location of other external rotators of the leg.
Pro Tip: make sure you understand what Internal and External Rotation is. If the leg is bent, it can be confusing. Always look at your femur to know if your leg is rotating away or toward your midline!
You’ll notice that those muscles all come from the sacrum or the pelvis (ischial tuberosity). Then they run across to the head of the femur, so it is a very small area that you need to work in.
The best way to find them is to find your sacrum, which is easy because it is bony and quite pronounced.
When you’re on the edge of that, you can apply some pressure with your legs extended and find some trigger points.
I like to add in a bunch of pin + stretch cycles to open up the hip really well!
That looks like this.
Now your hips should feel really good, and hopefully opening up your glutes will help with other areas too!
Here are some video tutorials of the glutes and deep hip muscles.
Then we can move on to the Hip Flexors and a new tool I love!
Trigger Pointing Your Hip Flexors
Tools I like to use:
Pso-rite, Thera-cane, Foam rollers, PVC Pipes, Soft Ball
…
Trigger pointing your hip flexors has never been easier.
You can obviously use the techniques we’ve gone over already with the softball or foam roller to try and get in there to deactivate your muscle spindles for serious relief…
But, I have come across 2 extremely effective techniques using the psorite and thera-cane!
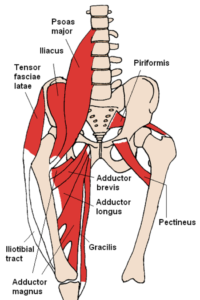
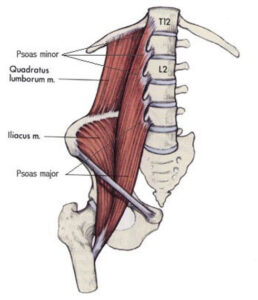
First, take a look at the muscles that flex the hip. You’ve probably heard of the psoas before, but you’ll notice that there are a few more muscles at play here. You’ll also notice that they are all over. Some are deep in the pelvis, others are more superficial. And one, your TFL is outside the hip.
How To Release Psoas
Let’s focus on the deep ones first. Your psoas and iliacus are probably creating a lot of issues for you that you don’t know about. Your low back pain? Your knee pain? And yes… your hip pain could all be because of these hip flexors.
So, take your Thera-cane and lay on your back. This video will go into detail on how to use the thera-cane to pin your hip flexor before you let your leg out to stretch it.
I do this nearly every day and it will fix your iliopsoas problems!
The problem is that it is so hard to know where the issue is, and these muscles are hard to get to. That’s why I also got a pso-rite (not sponsored).
All you have to do is lay on it with the semi-circle right on the inside of your hip crest. You can add the right amount of pressure for you and sink into it while it deactivates those muscle spindles.
After 30 seconds, get up and do one of the ultimate stretching guides hip flexor stretches.
If you do that 3-4 times, your hip flexor will feel brand new again. I promise!
Now that you know how to fix your deep hip flexors, let’s talk about the tensor fasciae Latae, or TFL.
IT Band Trigger Pointing
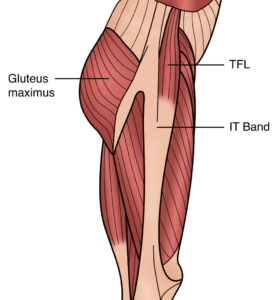
Take a look at the picture to the right to see where the TFL is located. When you lift your leg, the bulk of the muscle is bunched up by the hip. This is what it looks like when you lift your leg up (trigger warning – this is from the sports illustrated athlete body edition).
So, the secret to this muscle is to bend your led when you are targeting it. This will keep the muscle in a relaxed state and it won’t be too stretched out.
Take your Pso rite, or any ball at least the size of a softball, and lay on your side.
Pin your TFL with your tool of choice with a bent leg. Then after holding for about 5-10 seconds, extend out your leg into a stretched position.
Then reset for up to 10 repetitions! But, don’t forget to stretch every few rounds.
Get Rid Of Your Lower Back Pain
 Tools I like to use:
Thera-cane, Lacrosse ball or Tennis ball
…
If your pain is in your lower back, that doesn’t necessarily mean that those muscles are the cause, but these trigger point techniques fo your QL and erectors of the back will probably still help.
People freak out when I tell them 2 things fixed my back spasms when I was in highschool.
They don’t want to believe it, but it’s true.
And I think you’ll like these ones because they involve laying down and just breathing. But of course you will want to pair it with a stretch from the ultimate guide to stretching to really cement the change in your body.
First Let’s Start With The Lacrosse Ball
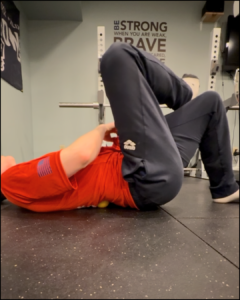
Lay on your back and place the ball under your quadratus lumborum, or QL for short. It sits close to your spine on both sides and is located in that crest between the back of your hip bone and lumbar spine.
All you have to do is breathe and relocate the ball every 30 seconds or so.
Pair that with the side bending stretch in our ultimate guide to stretching and you’ll be golden!
Thera-Cane For Lower Back Tension
There are 4 steps to this pin and stretch sequence.
- Side bend
- Pin
- Stretch
- Repeat
If the pictures aren’t enough, watch the video on our youtube channel for a better visual.
Abdominal Trigger Points
Tools I like to use:
Thera-Cane, large ball
…
I bet you have never seen somebody pushing something into their stomach to loosen up their abdominal wall!
And it would be for a good reason. People don’t know how hard is too hard.
There are a lot of organs around there that you don’t want to damage them and hurt yourself more!
But you do want to make your muscles function properly.
So, to use these techniques, please be slow with adding pressure over time. What you will find is that your breath can be an amazing tool to stretch and compress the pressure in that area.
How To Release Your Abdominals With The Large Ball:
It is very simple. Slowly lower yourself to lay on the floor, face down. As your abdomen lowers to the floor, place the ball in one of the 4 quadrants of the area.
Systematically move up and down, abd side to side while taking time to breathe in the position, but also extend away from the floor to add in stretching movements while in a pinned position
If you ever experience a sharp pain, you are applying too much pressure and need to back off. It is meant to be slightly uncomfortable, but never extremely painful.
Thera-Cane Abdomen Technique
Using the Thera Cane can also be tricky for the abdomen. Again, you don’t want to press too hard and hurt your organs. This is more important for this technique because the surface area is much smaller for the cane.
All you have to do is lay on your back and place the straight end into any area of your abdominal wall.
I recommend starting in a corner and systematically working your way around, so you don’t miss any spots.
Apply gentle pressure with your arms pressuring down towards the floor and use your breath to adjust pressure more from there!
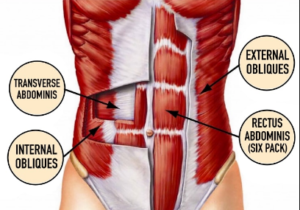
Don’t forget to work in your obliques too.
Opening Up Your Chest With Trigger Pointing
Lacrosse ball
…
The Chest is one of my favorite spots to work on, and it is one of the most neglected spots on the body, alongside your feet. For the Chest I like to use the pinning technique and also adding in a stretch in certain spots.
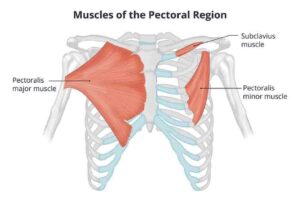
The chest is made up of 2 main muscles. The Pec Major and the Pec minor. If you look at the image of their location, you’ll see how the pec minor is really laid out in one direction, while the pec major fans out a lot.
If you keep that in mind, you’ll be able to use more advanced rolling techniques properly.
How To Do It
So, take the lacrosse ball and find an open wall that allows you to move your arm out to the side and up diagonally without hitting anything.
I recommend rolling along the muscle tissue to find the areas that need the most work. You can pause along the way, or remember where those spots were and go pin them for 30 seconds after you’ve explored the entire muscle.
And don’t forget to stretch after you trigger point! Cement those changes for good.
How To Trigger Point Your Rotator Cuff
 Tools I like to use:
Lacrosse ball
…
Bear with me on this one because it will be a long explanation. Skip down to the “how to” section if you already know how these muscles work.
So if you have pain anywhere in your shoulders, your rotator cuff may be to blame. There are a lot of muscles that weave through such a small area, and most people neglect themselves by never working on these smaller muscles. Over time, this will create imbalances, muscle adhesions, and of course…pain.
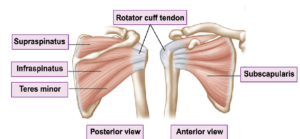
Let’s start with the main rotator cuff muscles that externally rotate the arm. Take a look at their locations with the image to the right. You’ll notice that they stack one on top of another, mostly from the far crest of your scapula all the way to your humeral head or at least very high up on the arm!
Pro Tip: pay attention to how each of the muscles align horizontally. This will help with understanding how to roll with and across the belly of the muscle for the best outcome!
Most people will have trigger points somewhere in the middle of their scapula. The infraspinatus and teres minor/major all make up this area and mostly do the same thing (teres major acts as an internal rotator) The other area that will likely fire up when you add pressure is the space between your scapula and arm. I like to call it the back of my armpit.
How To Do It
Let’s get into it… take your ball and sandwich it between you and a flat wall. I recommend bending your knees a little bit so you can have some extra leverage and pressure if you want it!
As you come across trigger points in the areas we talked about above, rest on them for 30 seconds. After approximately 30 seconds, stretch the muscles you are on with this guide, and you’ll be all set!
And if you’re confused about any of this… I don’t blame you. I have made this video to give you a better visual of what it should look like!
Also for the overachievers… I wrote this article on how to do the pin and stretch technique on your rotator cuff. Check it out if you need fast and long lasting results.
Trigger Pointing Your Trapezius Muscle
 Tools I like to use:
Lacrosse ball, Thera-cane, doorway (yes, a doorway… I’ll explain)
…
I bet a lot of you came for this section because you hold your tension in your shoulders and therefore hold all your tension in your traps.
I don’t blame you! We shrug a lot. We look down at our phones a lot. And these muscles are overworked. So let’s just jump in with the most useful trigger point method I have. If you don’t have a thera-cane yet, get one. And for now, skip to the next section.
Using A Thera-Cane On Your Traps
Most people get this wrong. They use the thera-cane to try and massage their traps all over and they end up digging in for too long and hurting the delicate muscle and connective tissue they have there.
Here’s how to actually do it. It’s four steps
Shorten the muscle
Pin the muscle
Stretch the muscle
Reset
Make sure that you try different angles and different locations on the muscle to relieve tension throughout the entire area. Another thing I like to do is change up the amount of pressure I use. You don’t always have to crush the muscle when you pin it down for a trigger point.
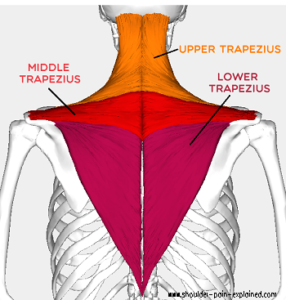
This technique works best when you are on your upper trap, which is where you likely have your issue, but there is a lot more to your trapezius muscle than the area you feel when you do a shoulder shrug.
Let’s talk about it!
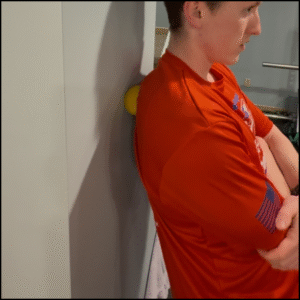
How to use a lacrosse ball on your traps
Using a wall and a slight knee bend for leverage, you can pin your trap by leaning into the lacrosse ball. I like to systematically go up and down the muscle while going across the muscle and strumming it like a guitar.
This really helps to break up tension. When I am done with that I will go back to the worst spots and, you guessed it, rest on those spots for 30-45 seconds. I make sure to breathe into it because the expansion of the ribs helps when you are on your back like this.
Pin and Stretch
Watch this video to see how to pin and stretch the lower and mid trap.
Using a doorway to fix your traps
I’ve gotten some weird looks while using a doorway or a corner of where two walls meet as my personal massage therapist. But the joke is on them, because I am pain free.
You can use these areas or even large poles (basically anything with a corner on it) to pin your traps and mid back at any time. If you ever feel tension and want a quick session remember, you can use your environment to your advantage!
Deltoid Trigger Point Therapy
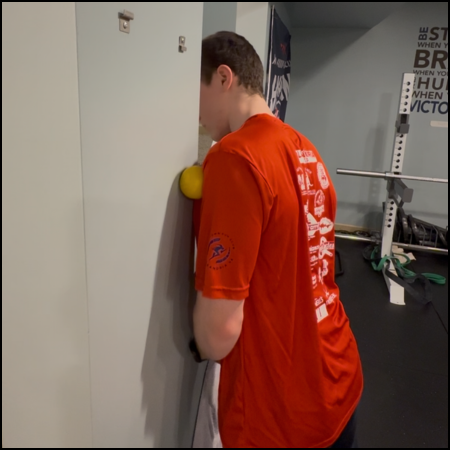

Triceps Trigger Point
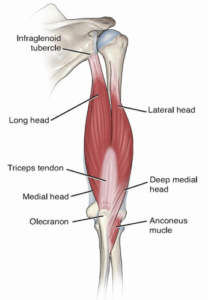 Tools I like to use: PVC pipe foam roller, lacrosse ball
Coming soon
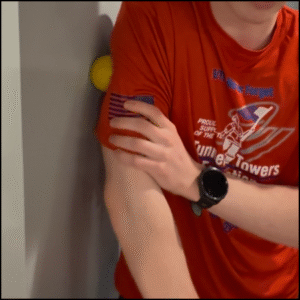
Fixing Your Neck
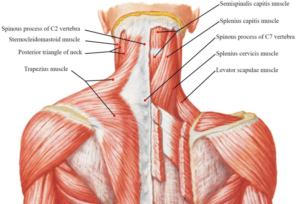 Tools I like to use: Thera-cane
Lay on the ground on your back and position the rounded section of the thera-cane at the base of your skull like this picture shows.
You can use leverage from the ground and your arms to apply pressure to the muscles all around your cervical spine.
I like to pin the muscle and gently push it into the cervical spine to add pressure. You can also do slight head tilts and nods in different directions when you have the muscle pinned.
Paying Attention To Your Jaw
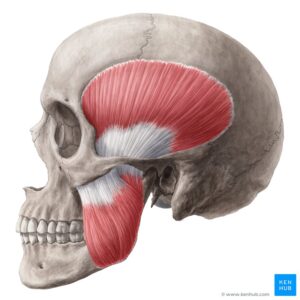 Tools I like to use: Lacrosse ball, hand/fingers
Coming soon
