The Ultimate Guide To Stretching
Target Body Part
Welcome to a future without pain!
In this guide, you’ll find stretches to help every part of your body feel better.
This guide may about stretching, but if you want even more progress, try learning about trigger point therapy and ways to move each body part better with mobilization techniques!
To understand why stretching matters, check out my article, “What Happens in the Body When You Stretch.”
It will make you more informed than most exercise physiology graduates after reading it.
For now, let’s focus on stretching each part of your body to help you feel great!
From toe to head: let’s get rid of pain and get more flexible!
Stretching Your Feet
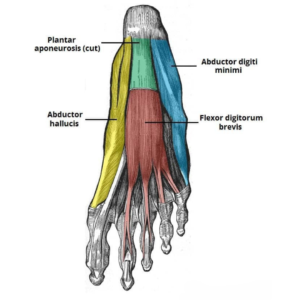 Tight feet can cause many problems in your body!
Foot muscles are some of the most used muscles, so if they’re out of line, you’ll feel it everywhere!
Here are stretches to help with foot issues like plantar fasciitis and even other problems you might not know are related to your feet.
Try these fixes:
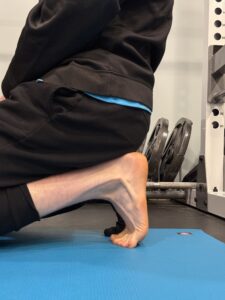
Dorsi Kneels
This stretch can burn a bit and feel uncomfortable, so start slow! It’s great for easing plantar fasciitis and loosening up stiff ankles.
Begin with a few rounds of holding for 10 seconds, with 10–15 seconds of rest between. Over time, you’ll be able to sit on your heels longer, and you’ll feel the difference in your body!
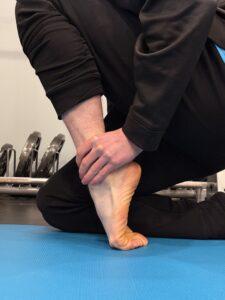
Toe Points
When you walk, muscles like the Anterior Tibialis and others in the front of your shin work hard. This stretch helps those muscles and tendons.
Simply use your hand to add pressure to the stretch on the front of your foot and ankle.
It’s easy to adjust to your level, so give it a try and show those muscles some care!
Stretching Your Ankle (the muscles around it)
Ankle Rolls For Flexibility
To get more movement in your ankle, use your full range of motion often! Testing how far your ankle can move is a great way to stop stiffness before it starts.
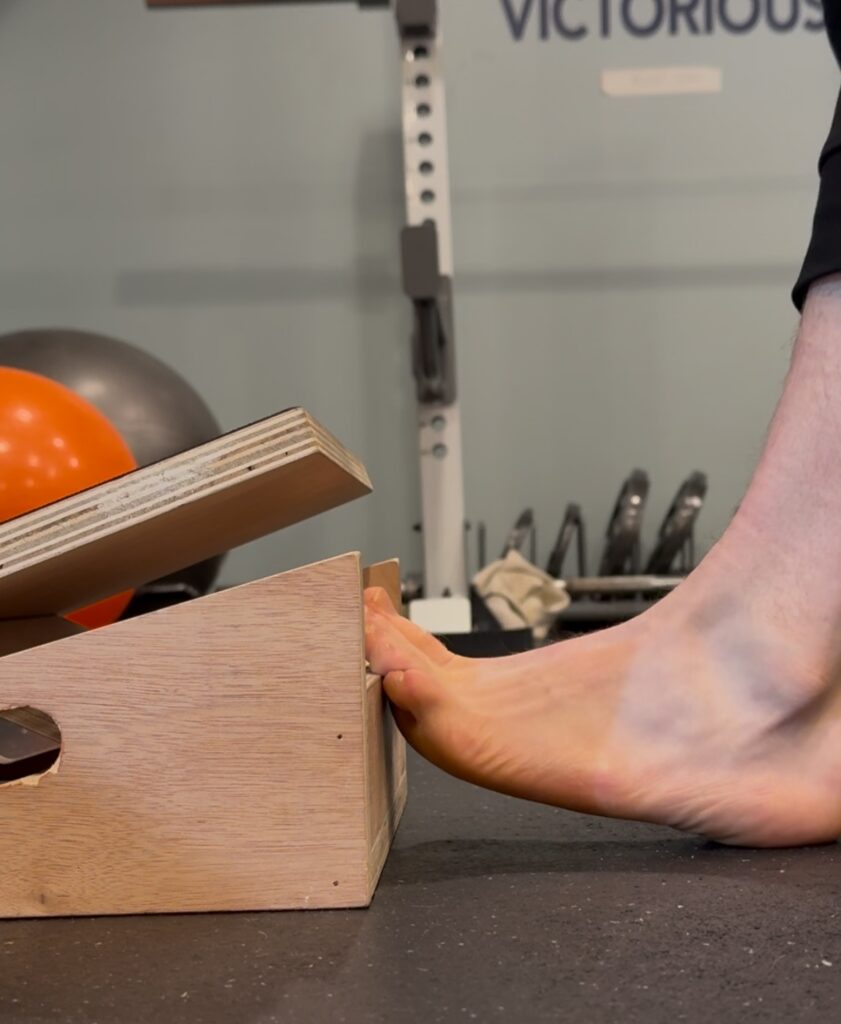
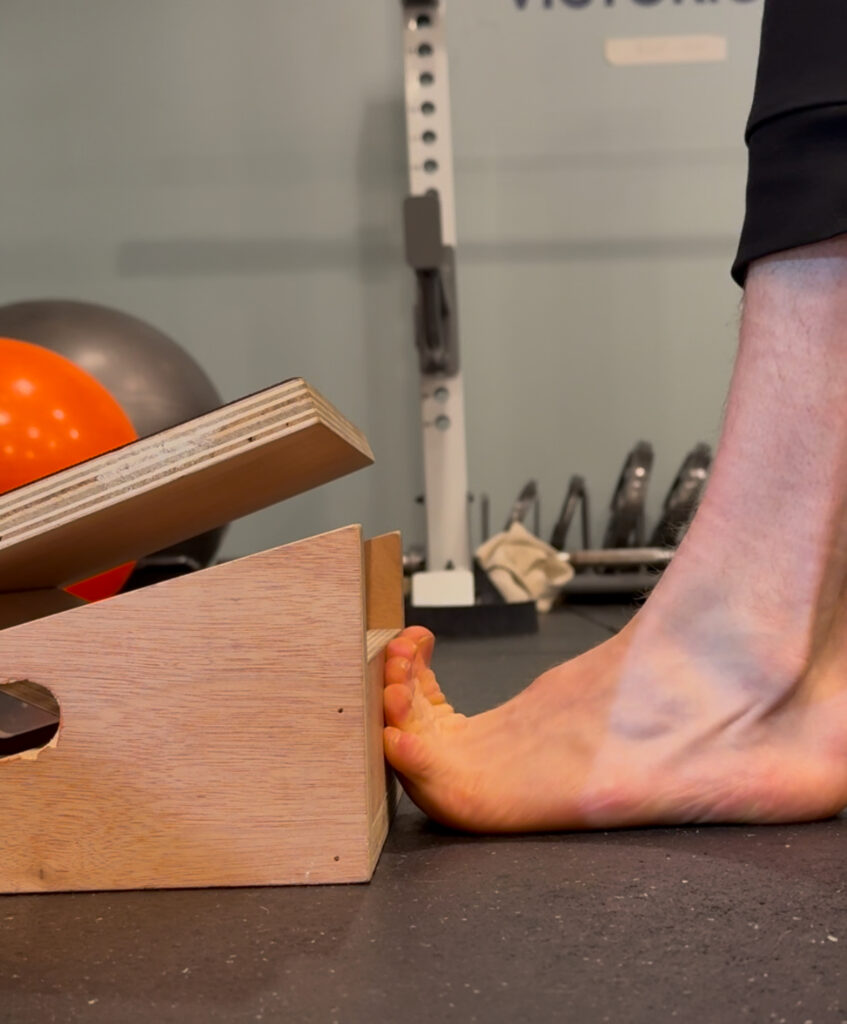
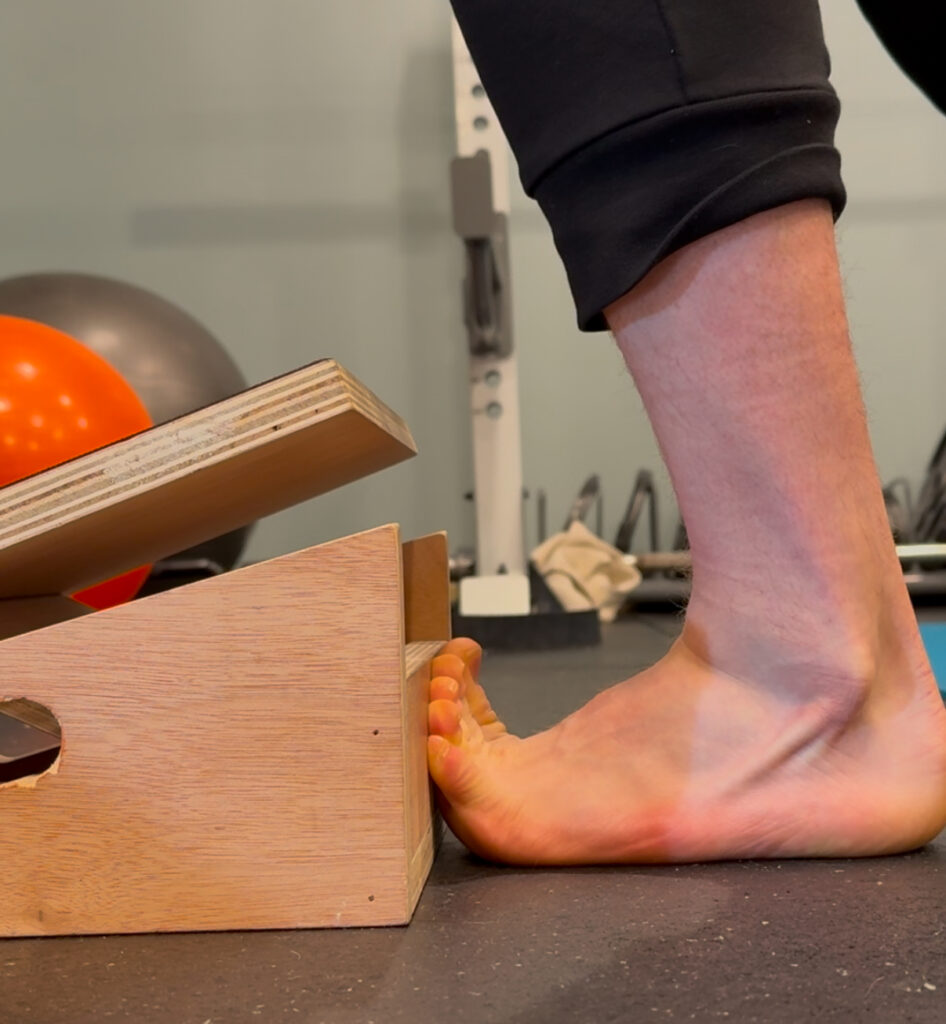
Curled Toe Calf Stretch Against A Wall
This stretch has helped my ankles more than any other! I’m not joking.
Most people focus on the big calf muscles, the soleus and gastrocnemius (next section), but there are deeper muscles that matter too.
Here’s how to do it:
Start by curling your toes up against a low wall and lean into the stretch.
You can make it stronger by pushing your knee forward or curling your toes more, which stretches the bottom of your foot.
You can also try moving your knee in different directions (left or right) to stretch different muscle fibers.
Don’t stick with the same stretch—switch it up to work all the muscles and tissues! (watch the video below)
Stretching Your Calf
 Curled Toe Calf Stretch Against A Wall
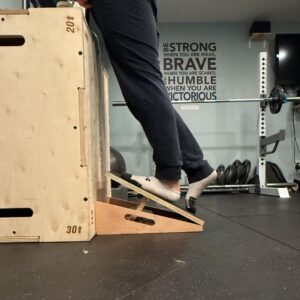
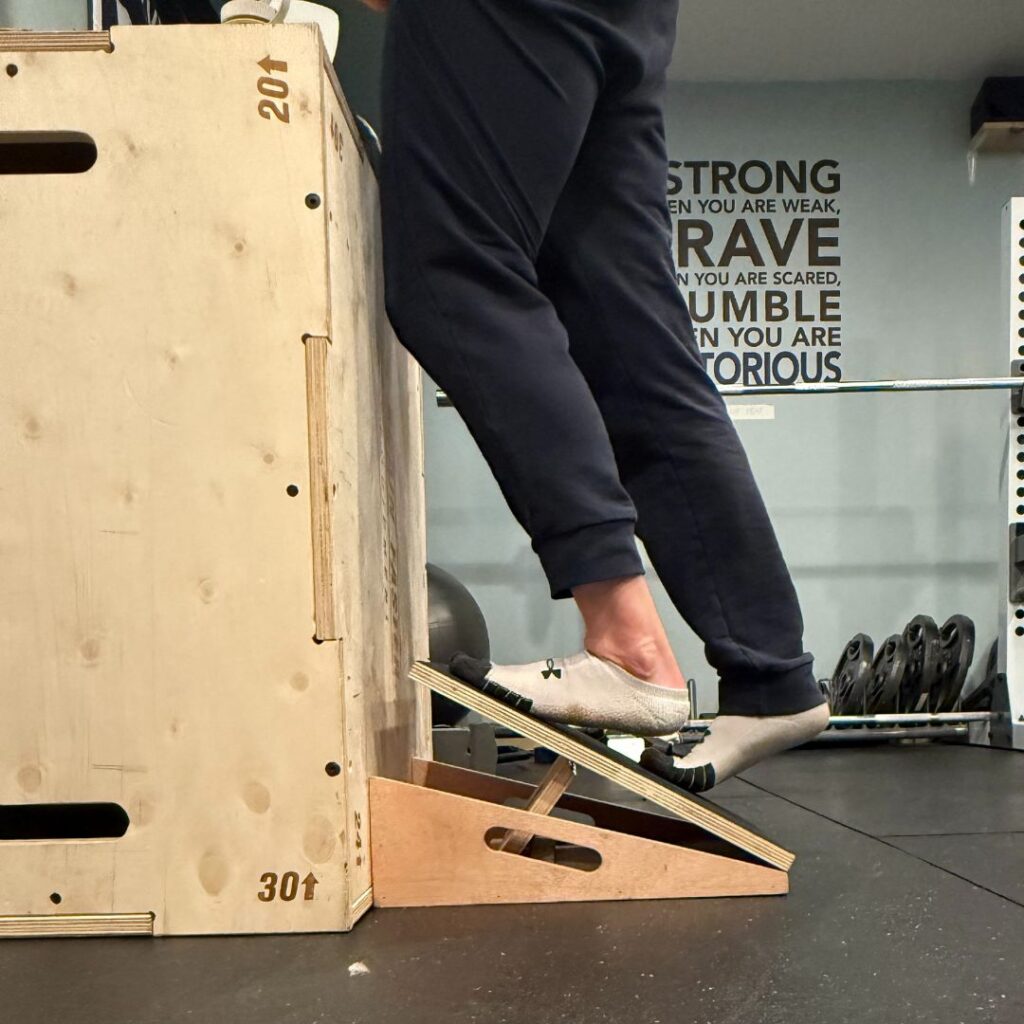
This stretch is not only good for your ankles (read and watch above), but it’s also a great stretch for your calves.
If you don’t have a slant board, think about getting one (and check out our list of the best body work tools)! But if not, a stair or ledge will work just fine.
Gastrocnemius & Soleus Calf Stretch
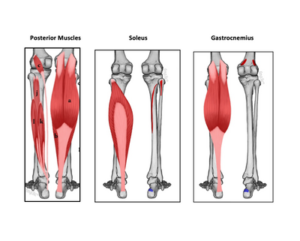
As you can see above, the Gastrocnemius, or “Gastroc,” is a unique muscle.
It has two parts, goes across the knee joint, and connects to the soleus and Achilles tendon.
It’s super important!
To stretch your gastroc, keep your leg straight (as straight as possible) and lean forward, or let your heel drop lower for more stretch.
You can use it to sink into a deeper low calf stretch!
I made this video to show you exactly how I do it.
To stretch your soleus (lower calf), simply drape your heel over the edge like you’re stretching your upper calf, but bend your knee a bit.
That small bend moves the stretch down to your mid and lower calf, targeting the soleus.
Stretching Your Hamstrings
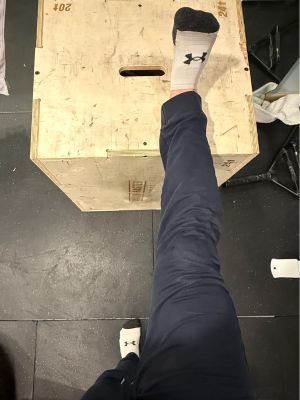
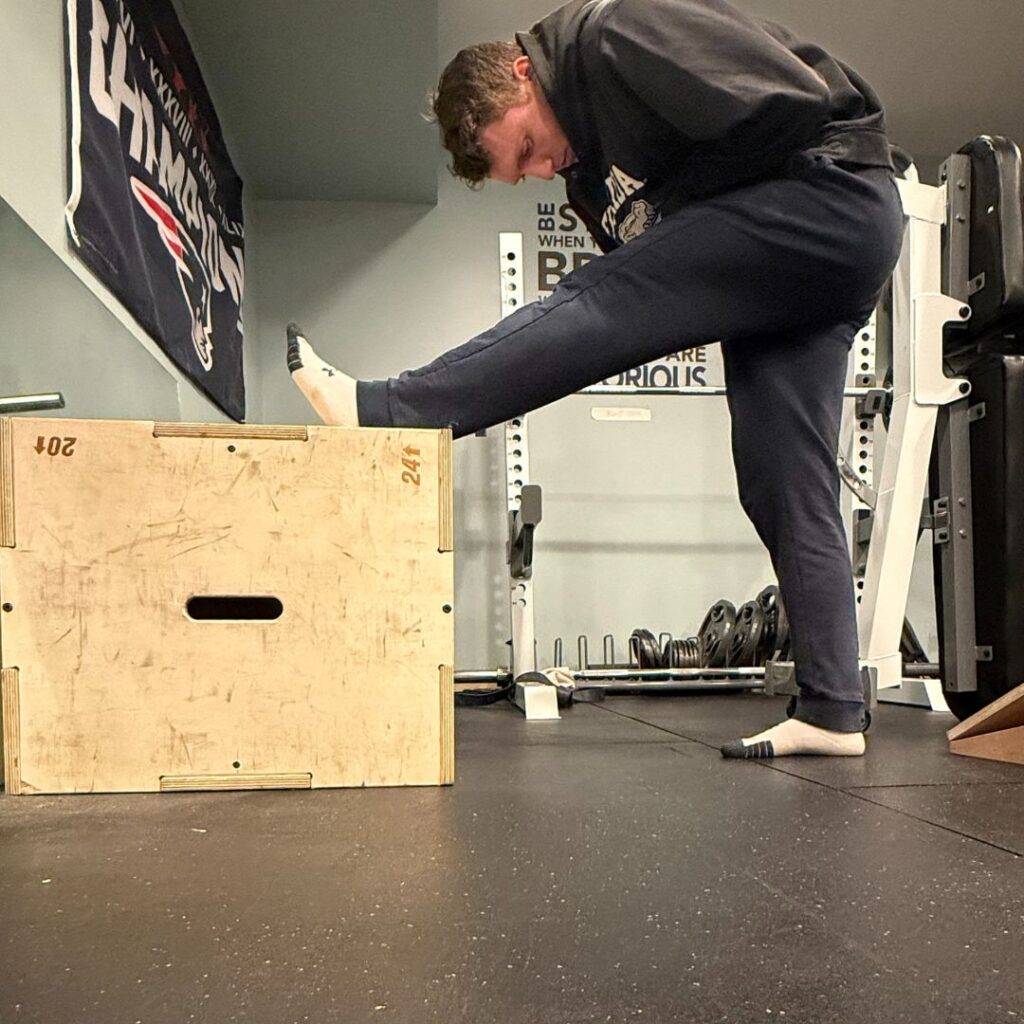
Leg On Ledge (pick the right height for you)
This is the best hamstring stretch for beginners. Period.
Start by placing your heel on a low ledge.
Make sure your planted foot points forward in the direction you’re facing, not out to the side. Then, let your hips bend without rounding your back.
You don’t need to touch your toes; just tilt your hips to feel the stretch.
Not feeling it? Try a taller ledge.
Remember, planted foot points forward, slight knee bend, lean forward at the hips.
Here’s a video for you to see it in action!
Pro tip: For a deeper stretch, grab your foot with a strap, belt, or your hand (if you can reach).
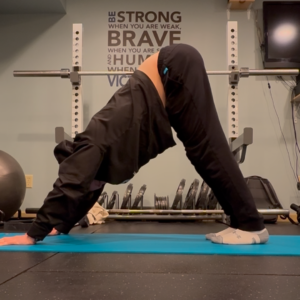
Downward Dog
A classic stretch on the hamstrings! Try these variations to find what works best for you:
- Pedal out
- 1 leg up
- Far out
- More knee bend
- Hips pop up (reach up to the sky)
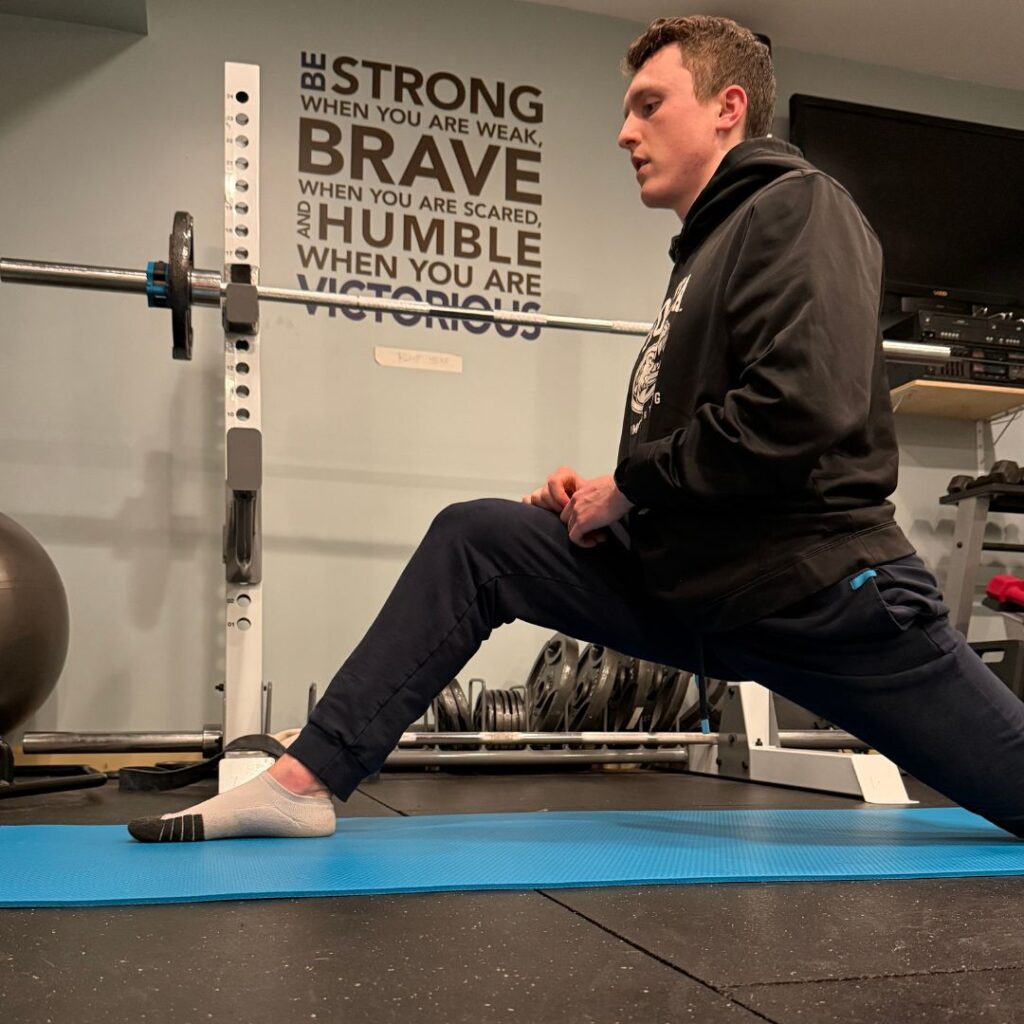
Deep Lunge With Hamstring Focus (slight mobility practice)
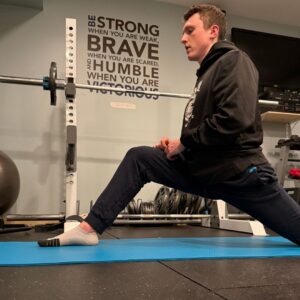 This stretch is for flexibility and mobility and it helps get rid of hamstring tightness.
Use yoga blocks or something sturdy to support yourself on each side. Get into the deepest lunge you can hold.
Let your hips sink down for a strong hamstring stretch in the middle of your muscle.
An isometric hold here can teach your body to trust itself in an end range of motion position.
P.S. This is different from the Deep lunge for hip-flexors. Read about that below!
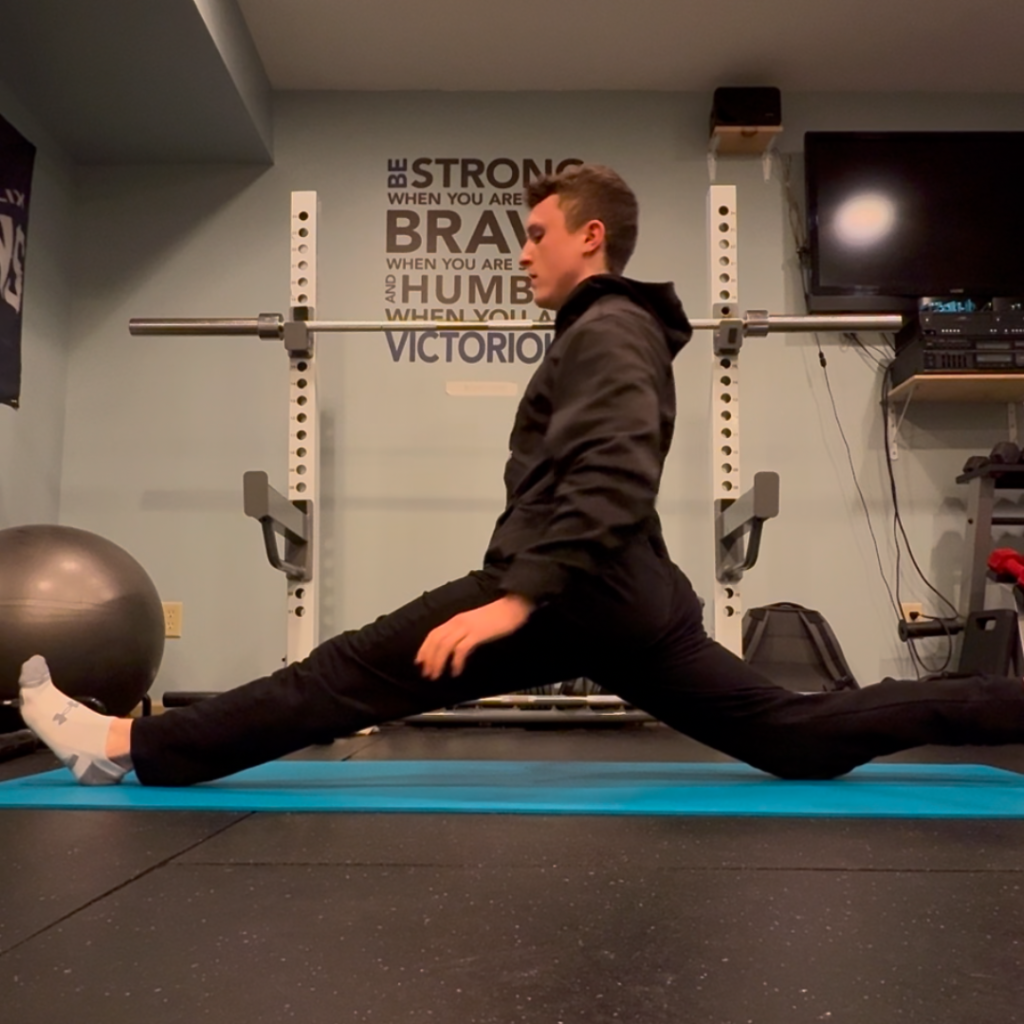
Split
The split is the ultimate test of flexibility.
It stretches the whole back of one leg and the hip flexor of the other. Getting there takes time, but anyone can do it with practice and consistency!
Here’s how I’d do it.
In order to make huge gains, you have to stretch deeply but carefully. Your body needs time to feel safe in this position, so spend a lot of time in A deep split.
Stretch at least twice a day with 3 rounds of this:
- Hold your deepest stretch for 5 breaths. After each breath, sink a bit lower.
- Deep and slow exhales teach your body to relax in an uncomfortable position.
Pro Tip: Don’t push past mild discomfort. Aim for a light to medium stretch each time.
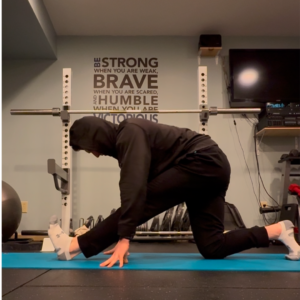
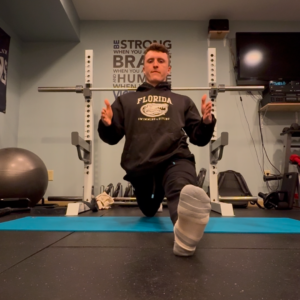
Hamstring Stretch Videos
Stretching Your Quads
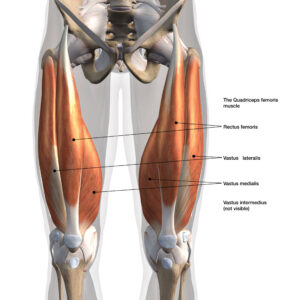 I’ve been battling tight quads for as long as I can remember.
Here are the best stretches that actually relieve tension and help with hip and knee pain you might be feeling!
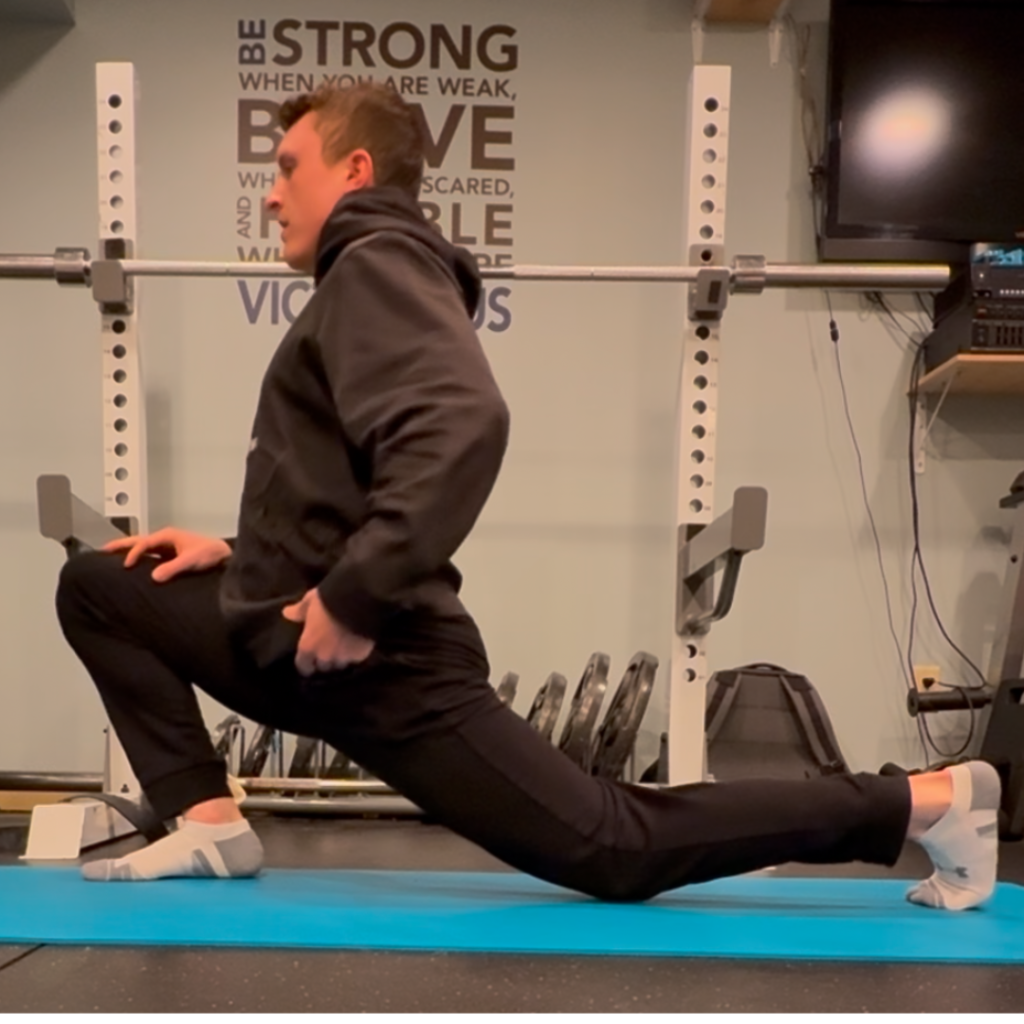
Deep Lunge – Quad Focus
This basic stretch is great for your quads and hip flexors. Start with one knee on the ground and the other in front.
Lean forward gently to stretch the front of your leg. If you feel it more in your core or hip flexors than your quads, that’s a sign to focus on those muscles too!
Couch Stretch
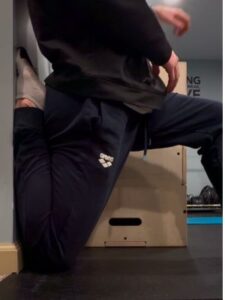
Use a couch or wall for this powerful stretch.
It’s like the deep lunge but even stronger for your quads. Start easy and increase the stretch as you get more comfortable.
Balancing Quad Stretch
Hip rotation matters. Make sure your hips are tucked properly to get the best stretch.
Squeeze your glutes to feel your hip bone tilt backward, giving your quad the full stretch it needs.
You can watch this video to learn about the balancing quad stretch!
Stretching Your Glutes
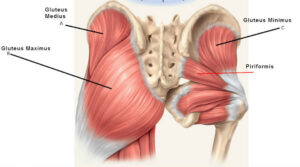 There are lots of hip muscles that get tight. Your hip can move in all directions, so it needs to stay flexible.
If your hips lose mobility, other joints try to help, which can lead to injuries.
Let’s prevent that!
Here’s the ultimate list of hip and glute stretches to help reduce pain in your back, hips, and sometimes even knees:
Knee Hugs And Figure Fours
This easy stretch can be done in bed or on the ground.
Lie down and pull one knee into your chest. You can make small circles with your knee to stretch the hip.
Try hugging one leg at a time, both legs together, or grabbing different parts of your leg for more stretch.
Now, from there you’ll want to do a couple of things. You can keep your hips down a bit more by driving your tailbone into the ground.
This might make you feel a little impingement in the hip socket area. That is okay!
I made this video so you can see exactly what I mean!
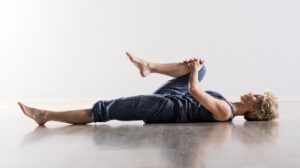
Lying Back Figure Four
This stretch works on deep hip muscles. Lie down and place one ankle over the opposite knee, making a “4” shape.
I like this one because it really stretches some of the deeper rotational muscles in a way that the knee hugs can’t.
Seated Version
If lying down doesn’t feel right, try this stretch seated. You might feel some relief in your back, too.
You can move side to side, forward and back, as well as in different areas of the chair to target slightly different stretches!
Half Pigeon
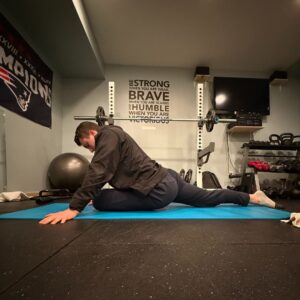
This stretch helps loosen deep hip muscles like the piriformis.
The goal is to get your hip down to the floor. Don’t let your hip lift too high, as that can stress your knee.
Keep your back flat and focus on feeling the stretch in your hip, not your back.
Common mistakes: People elevate their hip and it adds extra stress on the knee joint. People will also sit on their legs thinking that they are doing something.
Keeping your back flat will help you sink into a deeper stretch, but honestly, who cares if your back bends a little bit.
Just don’t lie to yourself thinking you’re getting a deep stretch when you are just rounding your back.
This all leads up to the full pigeon. If you’re like me, your hips don’t move this way naturally and modifications are needed.
Full Pigeon (with modifications)
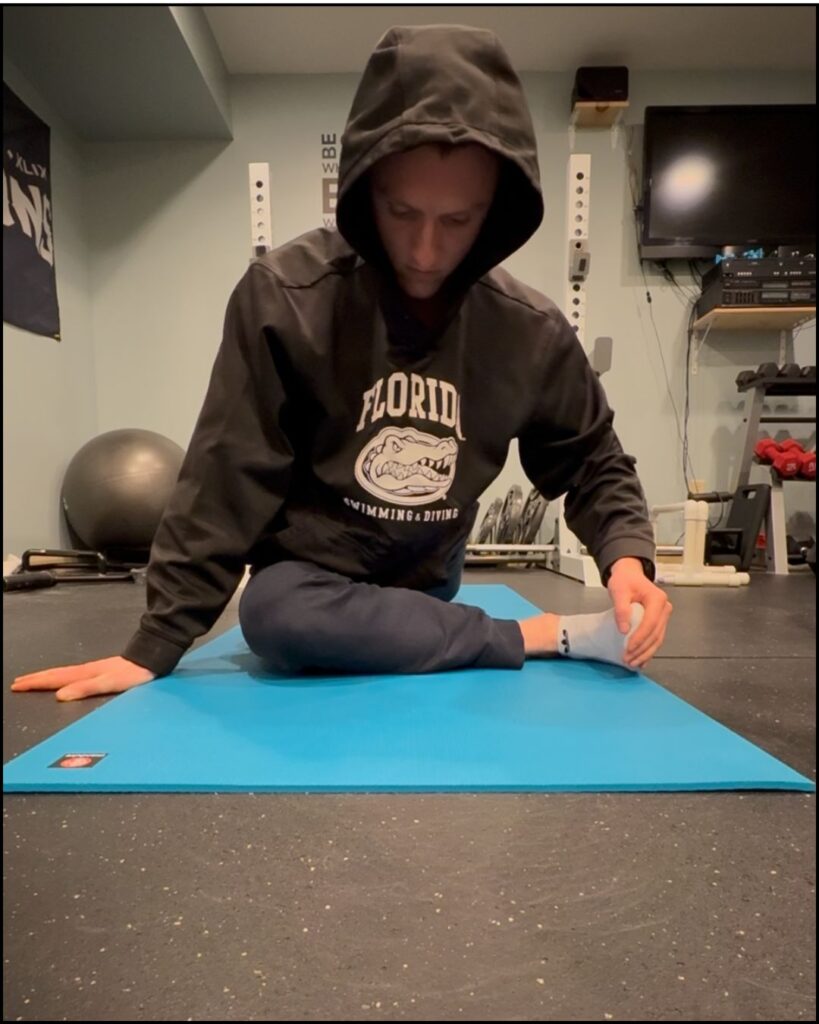
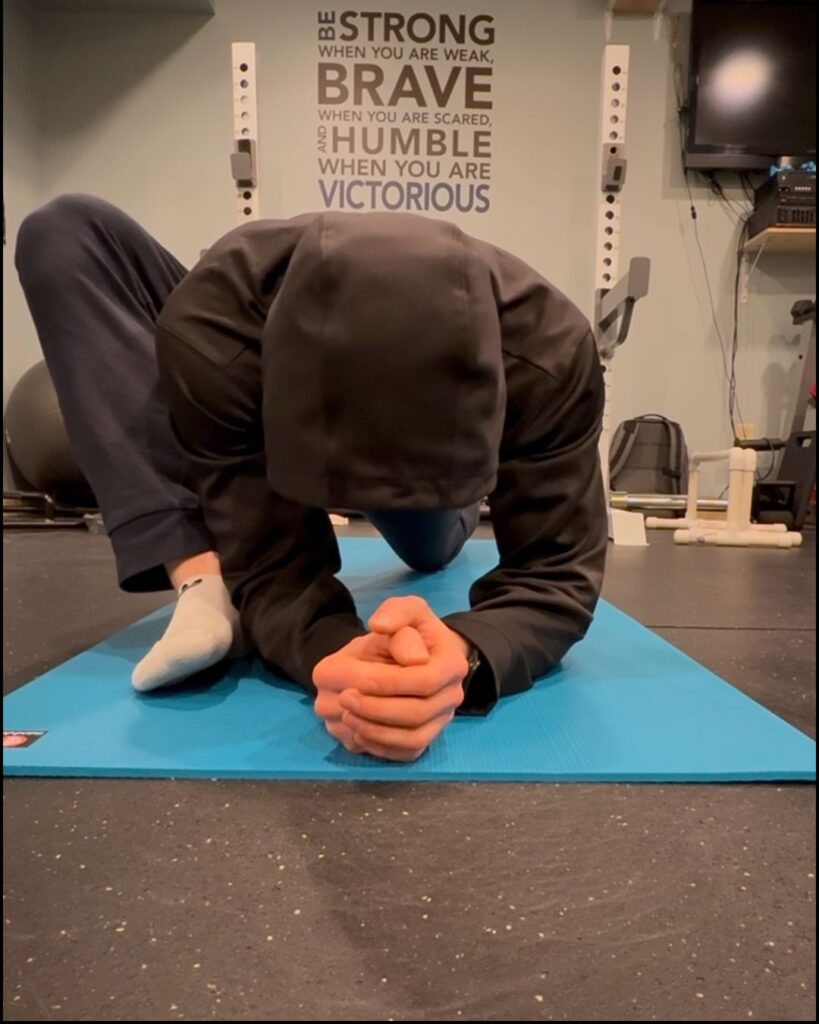
The full pigeon is one of the best hip stretches. It is great to work on your external rotation, but you have to make sure you use good form so you don’t hurt your knee.
Follow these steps to work up to it:
Level 1: Start with “¾ pigeon,” where your back leg is squared off and balanced, but your front leg is slightly less than 90 degrees.
Level 2: Try “table pigeon” with your leg on a platform, leaning into the stretch. You can also drop your body to deepen it too.
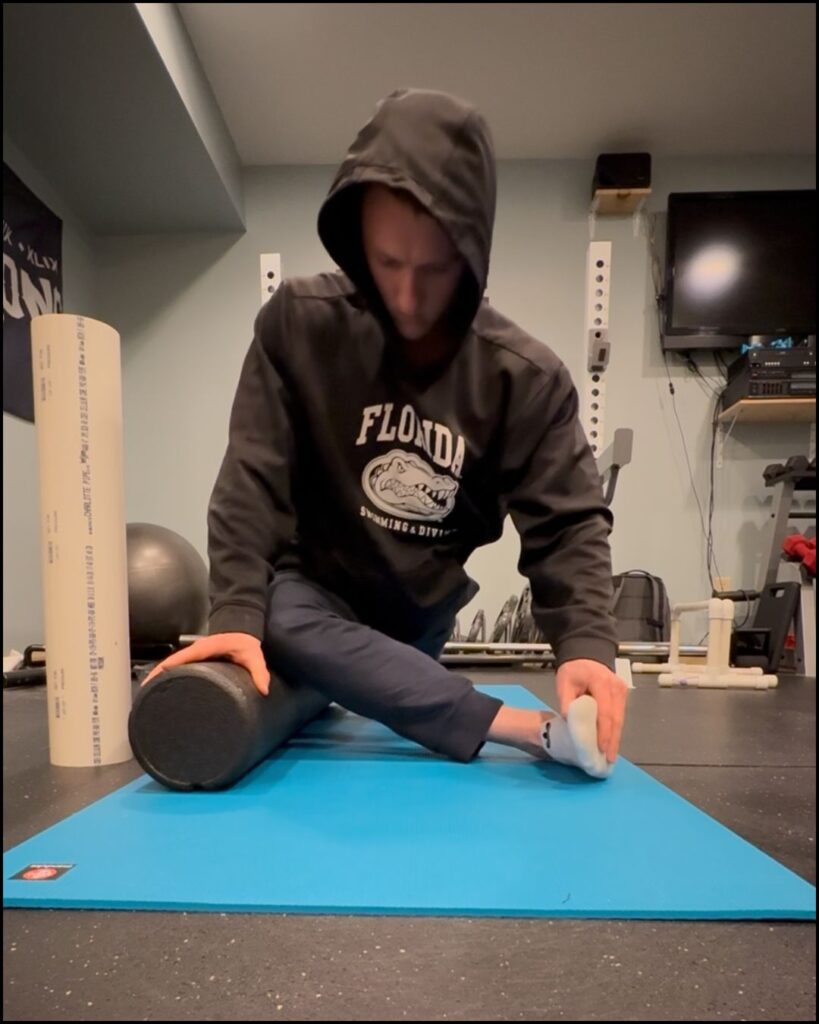
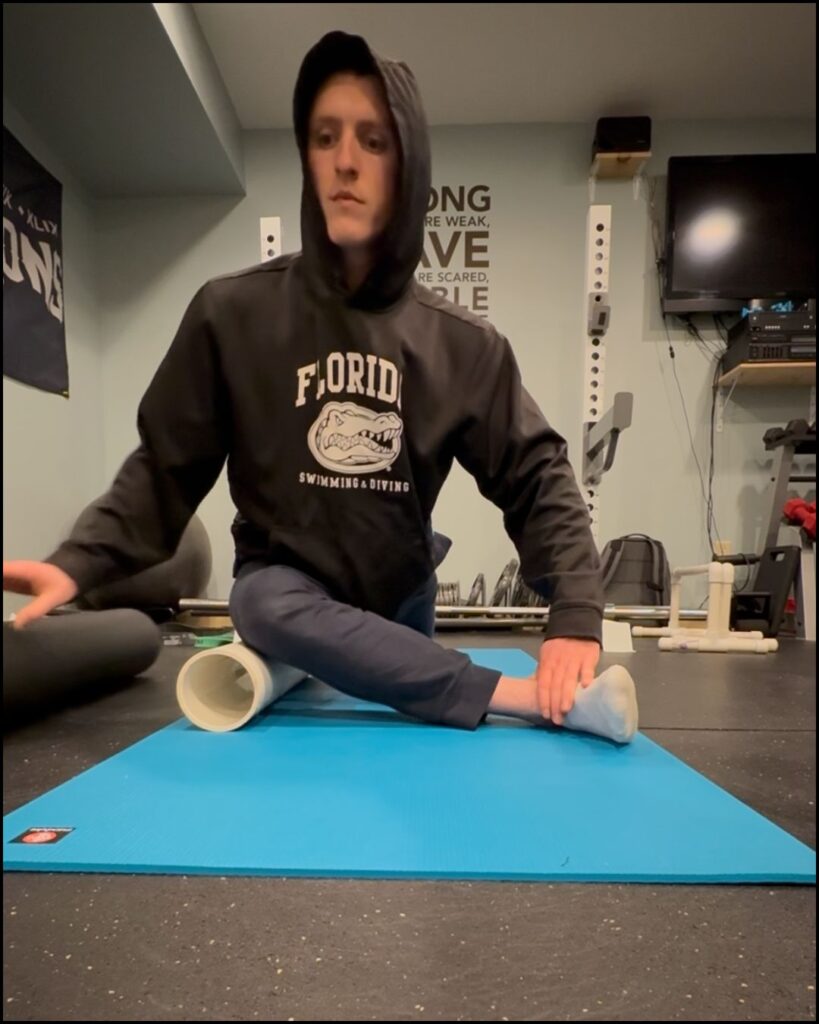
Level 3: Elevated full pigeon (video below) uses pillows or a foam roller for support as you work toward full pigeon.
All you do is place it under your stretched hip all the way down your femur to keep your leg all on one level!
Level 4: Full pigeon! Create the full 90 degree angle, and work your way into a deep hip stretch with squared off hips.
You will notice a lot of people “leaking” out to the side when they are sitting in pigeon. If this is you, just do half pigeon, or modify the full so you can work on the form before you overdo it.
Extra Moves For Experts
Deep Lunge (twisting version)
Start in a lunge, letting your hips sink down. Rotate toward your front leg as deep as you can, then untwist after a few breaths.
You can make this stretch better by:
- hip hinging deeper using your foot as leverage
- pressing out on your inner thigh
- spider crawl hands out to either side, and breathing deeply.
To add strength and balance to this stretch, start in a large split lunge and slowly control your descent down to your forward knee while maintaining posture in your back.
Then, as you get towards your lowest point, begin to twist towards your leg. This will work your legs and give you deeper mobility unlike any other exercise you’ll come across.
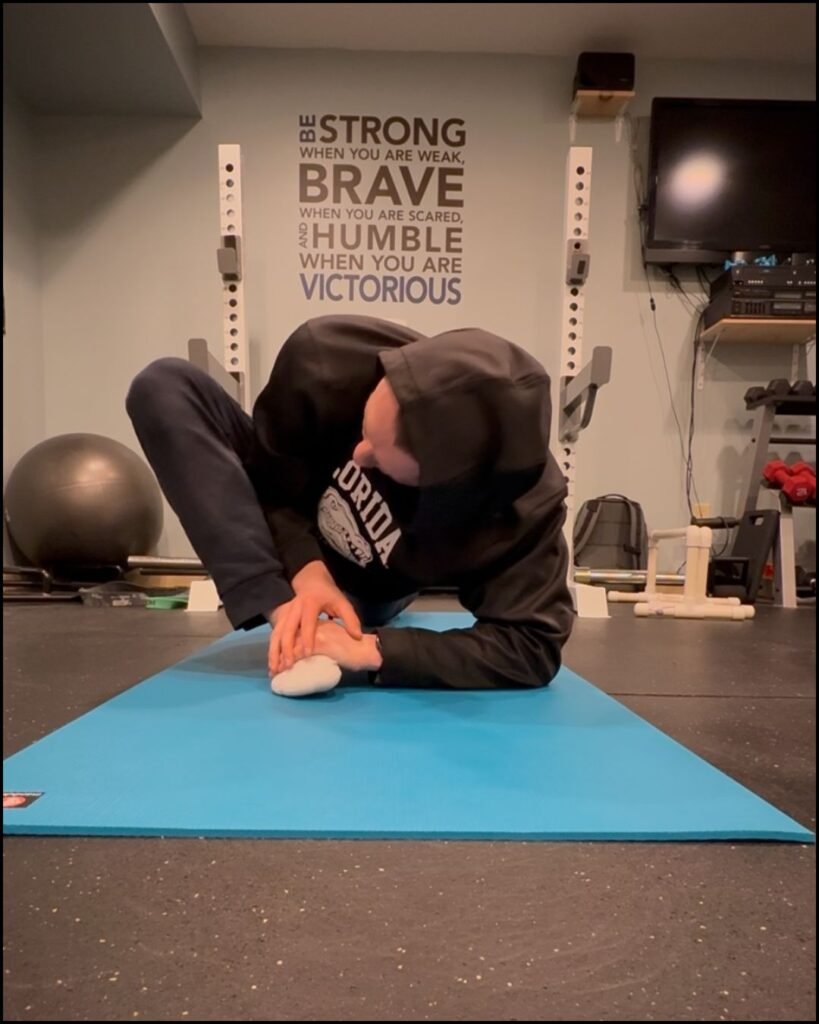
Happy Baby
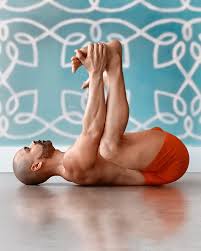
This yoga stretch is great for the hips!
Lie on your back, hold your feet, and bring your knees toward the floor.
Try gently rocking side to side for more stretch.
The trick to this is bringing your tailbone down (just like the knee hugs) and breathing into the stretch.
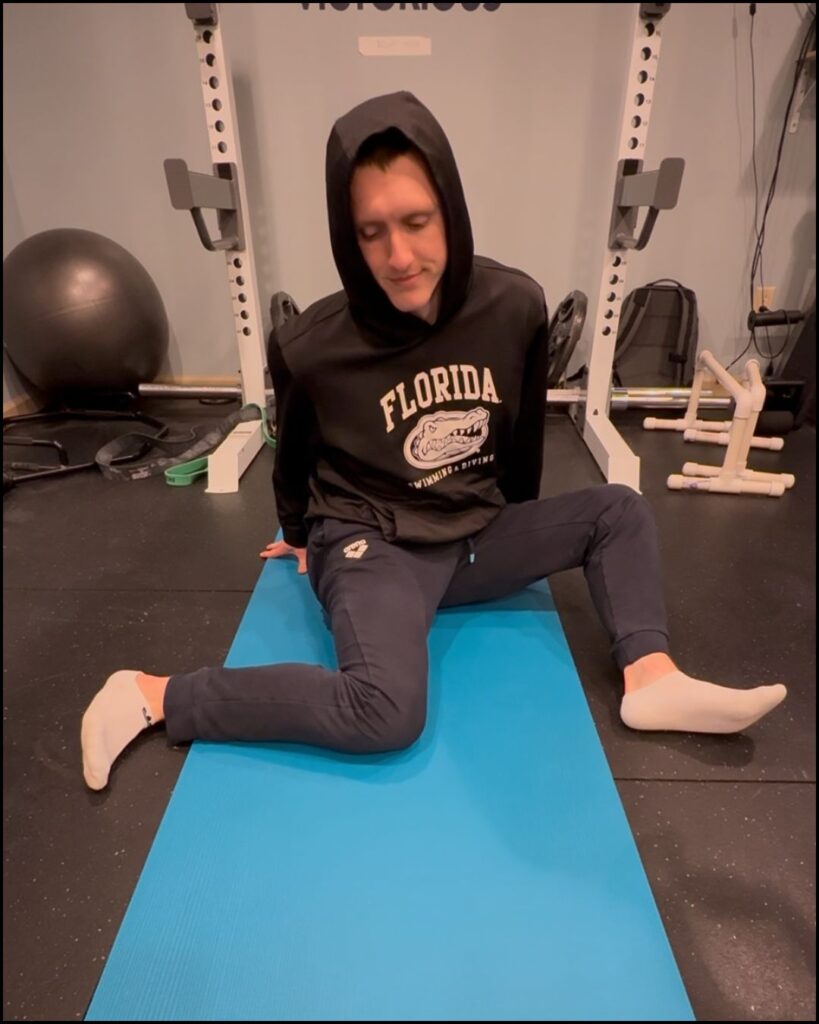
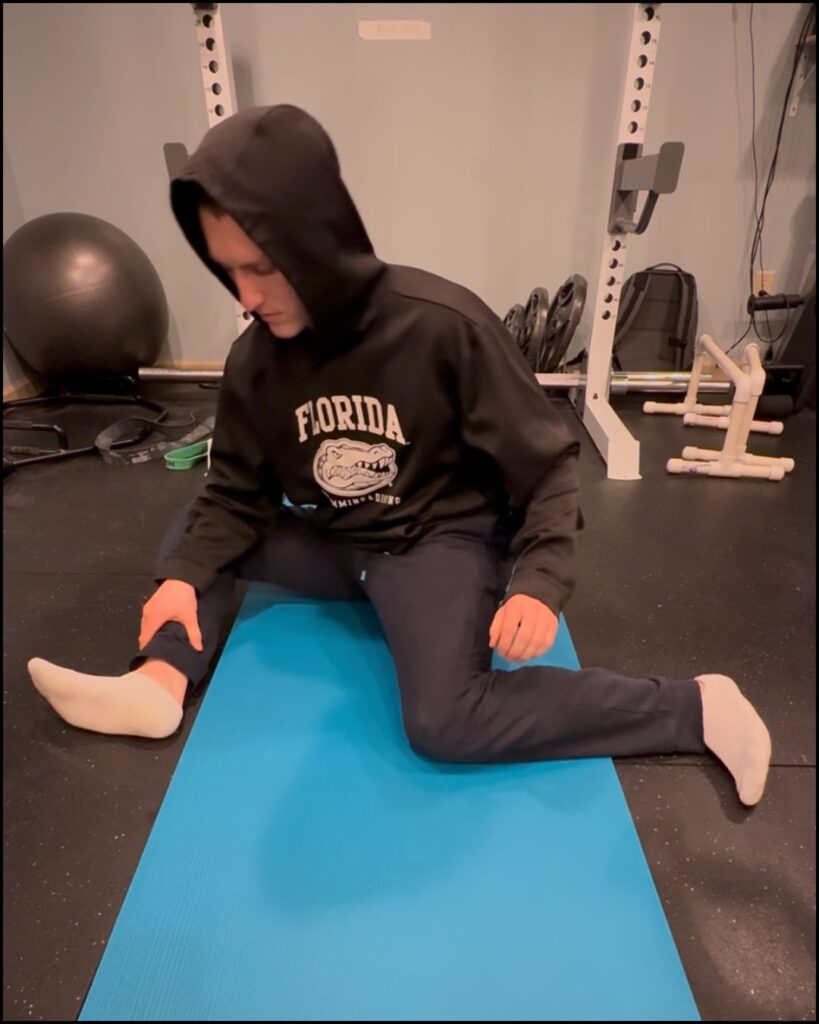
Windshield Wiper Hip Swivels
I use this everyday to get the internal and external rotators while warming up my hips for the day.
Sit in a 90-90 position with both knees bent and move your knees side to side like windshield wipers to stretch your hip muscles.
P.S. You don’t have to start with 90 degree angles. If you keep A deeper bend it will be easier to get those hips moving.
The more time you spend in these “end range positions”, the more your body will adapt and trust you in those positions.
That’s what fortifies your body from injury!
Bonus points if you do the internal rotator mobilization drill… Video below!
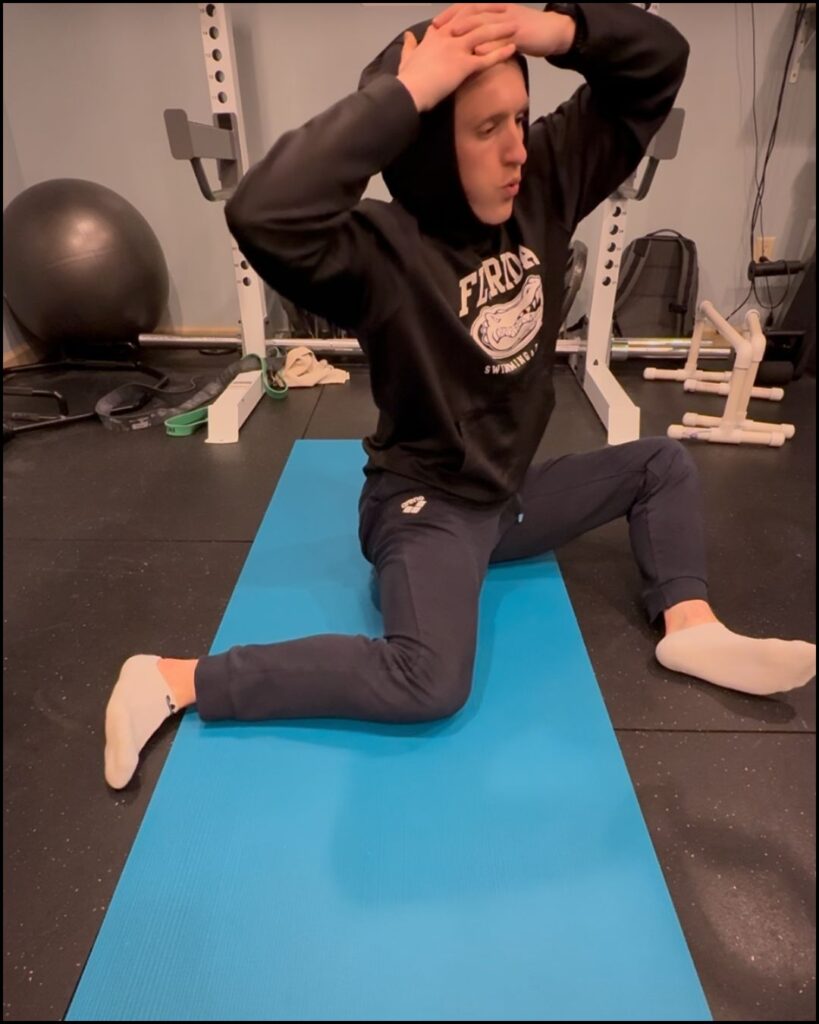
Stretching Your Hip Flexors
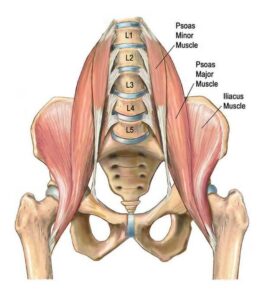 If you sit a lot—like the average person does—your hip flexors will likely be very tight.
Tight hip flexors can lead to lower back pain, muscle imbalances, and even knee problems.
Here’s how to help:
One Knee Up, One Knee Down

This is the most basic hip flexor stretch that I personally love adding into different routines I have.
Start with one knee on the ground and the other foot out in front. Tilt your hips by squeezing your butt.
For extra stretch, raise the arm on the same side as the down knee. This will also stretch your side muscles too!
Keep your hips square for best results! AKA don’t leak energy out to the side!
Deep Lunge
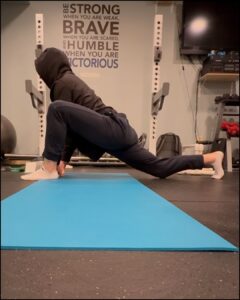
This stretch requires some balance and focus.
One leg goes forward and one goes back, stretching the hip flexor of the back leg.
Just like the pictures show.
Some variations to make it stronger are:
- Sinking deeper into the lunge
- Changing the foot placement farther apart
- Moving your arms to the left and right
- Straightening the back leg for a few seconds at a time
Follow along with the video to see it in action.
Anti Full Pigeon (be careful with the knee)
People will get mad at me for suggesting this one, but I like this stretch.
You don’t have to do it if you are worried about your knee… although if you do choose to do it, make sure you aren’t torquing your knee!
Start in the deep lunge position with your front leg bent.
You can then use the crease of your arm to support your leg by going around the outside and under your knee!
Just follow along the pictures below or watch this video!
From there You will want to sink your hip down and you should feel the hip flexor fire up!
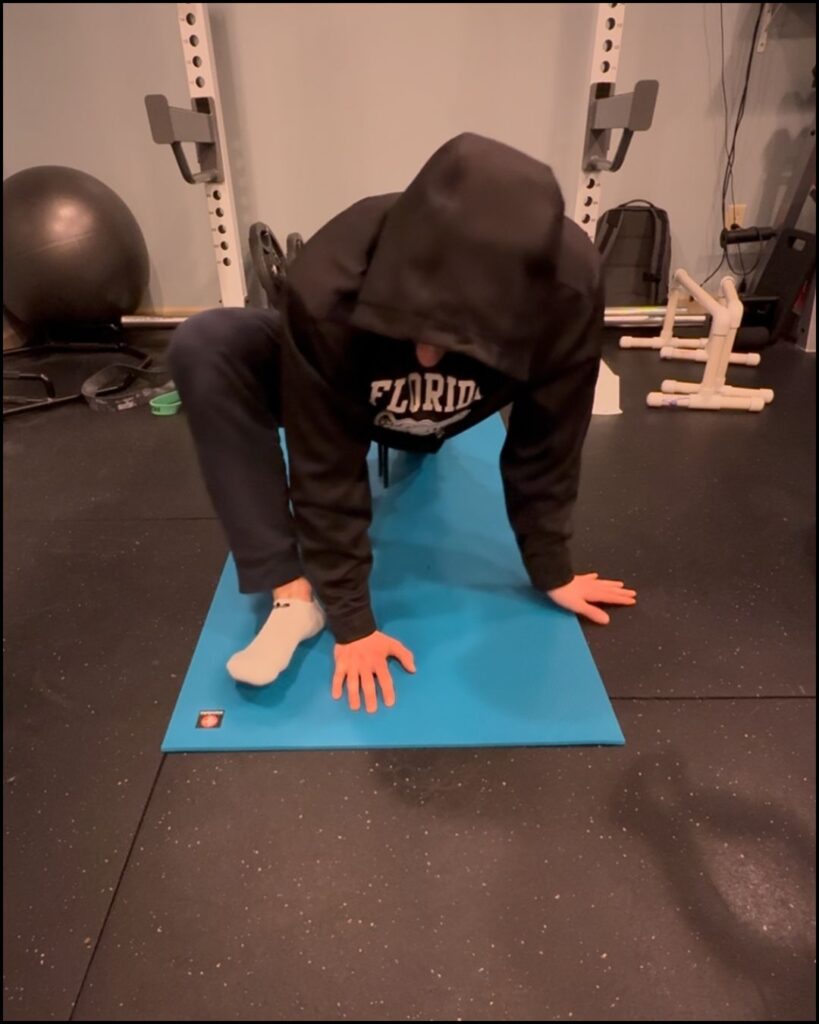
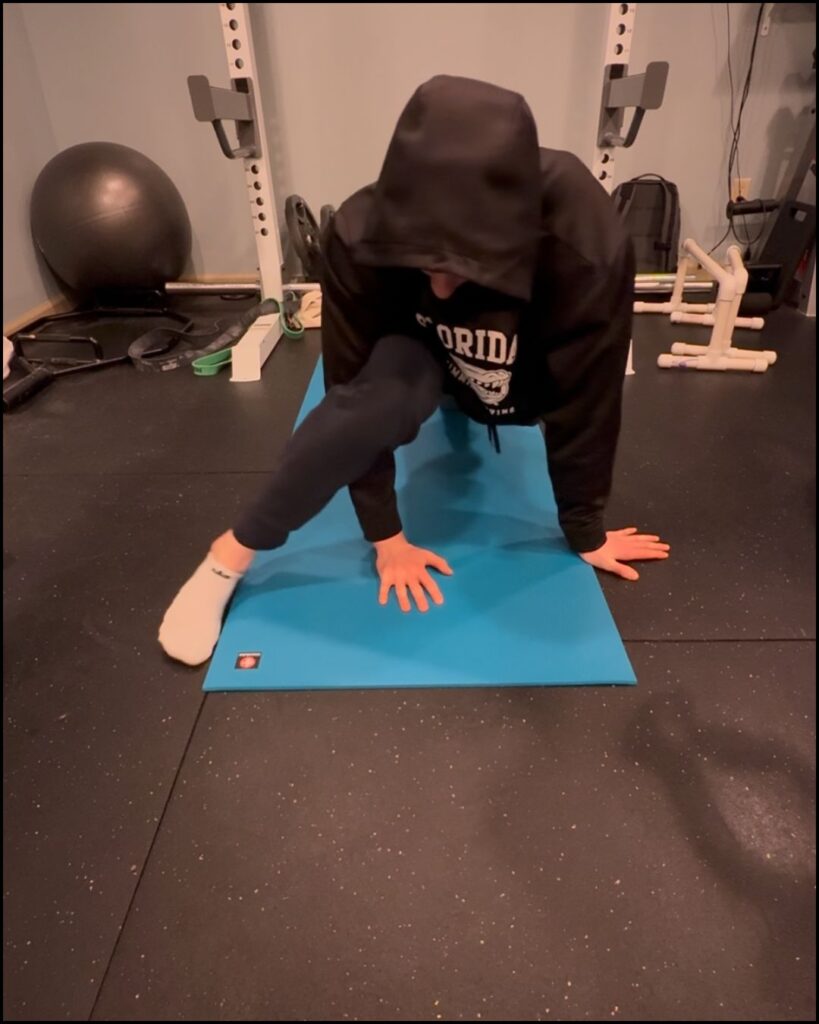
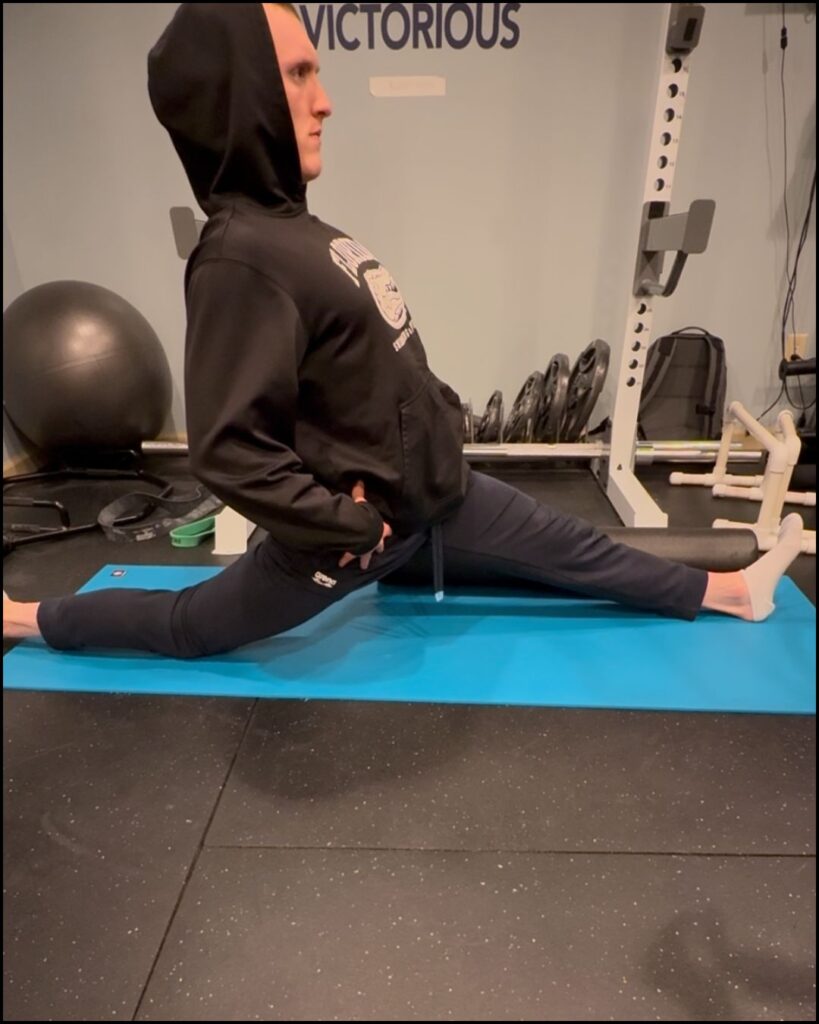
Right And Left Split
Like I said in the hamstring section, the left and right splits are an ultimate stretch for a lot of muscles in the lower body.
If you put your focus on the hip flexor that is being stretched, keep your body in alignment and breathe deeply.
This stretch will absolutely change your psoas and iliacus muscles for the better.
Pro Tip: Use a Theracane or similar tool to release tight hip flexors. This technique helps loosen them up fast! It is all available in my Theracane how to page!
I swear this^^ cures tight hip flexors so fast!
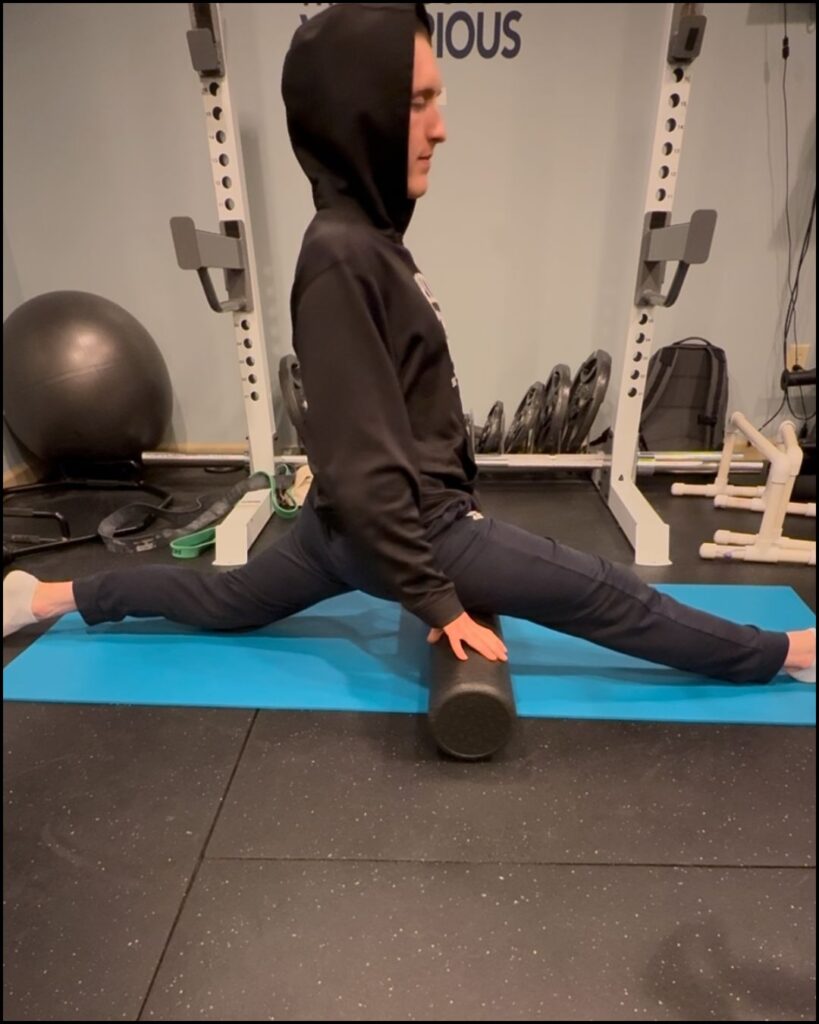
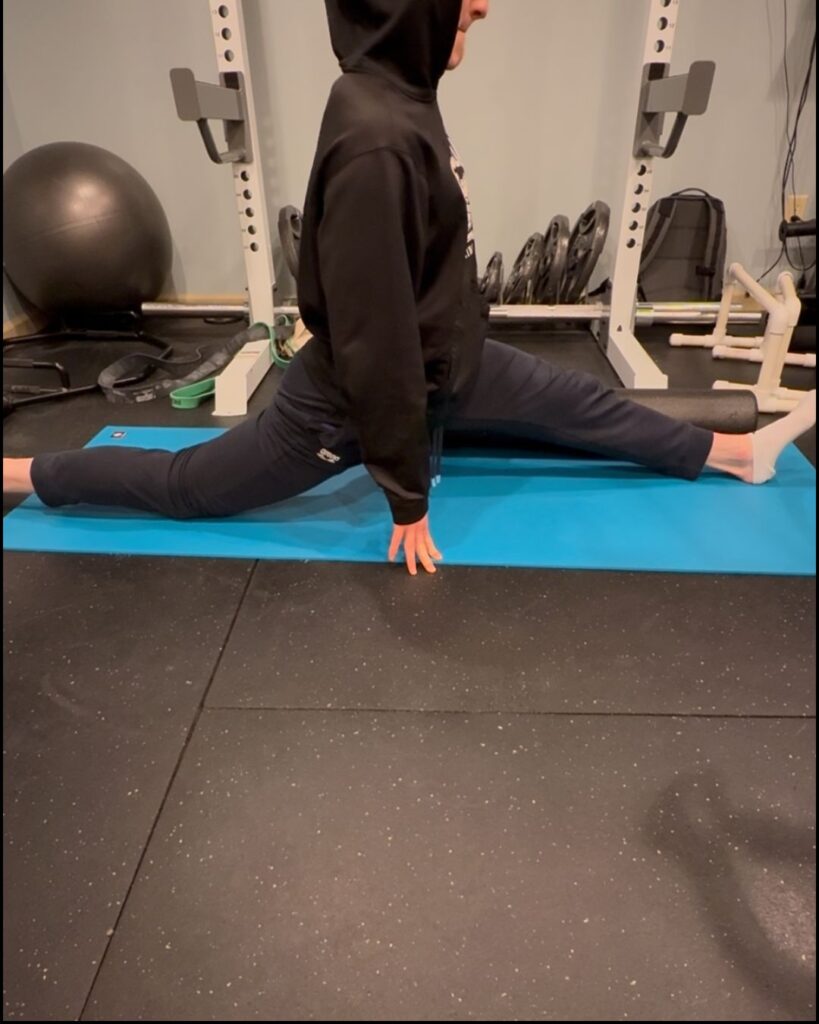
Stretching Your Adductors
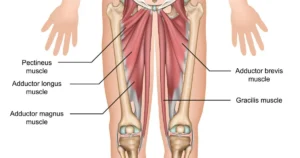 Ah yes, the forgotten section of leg muscles… but you obviously didn’t forget them if you’re here!
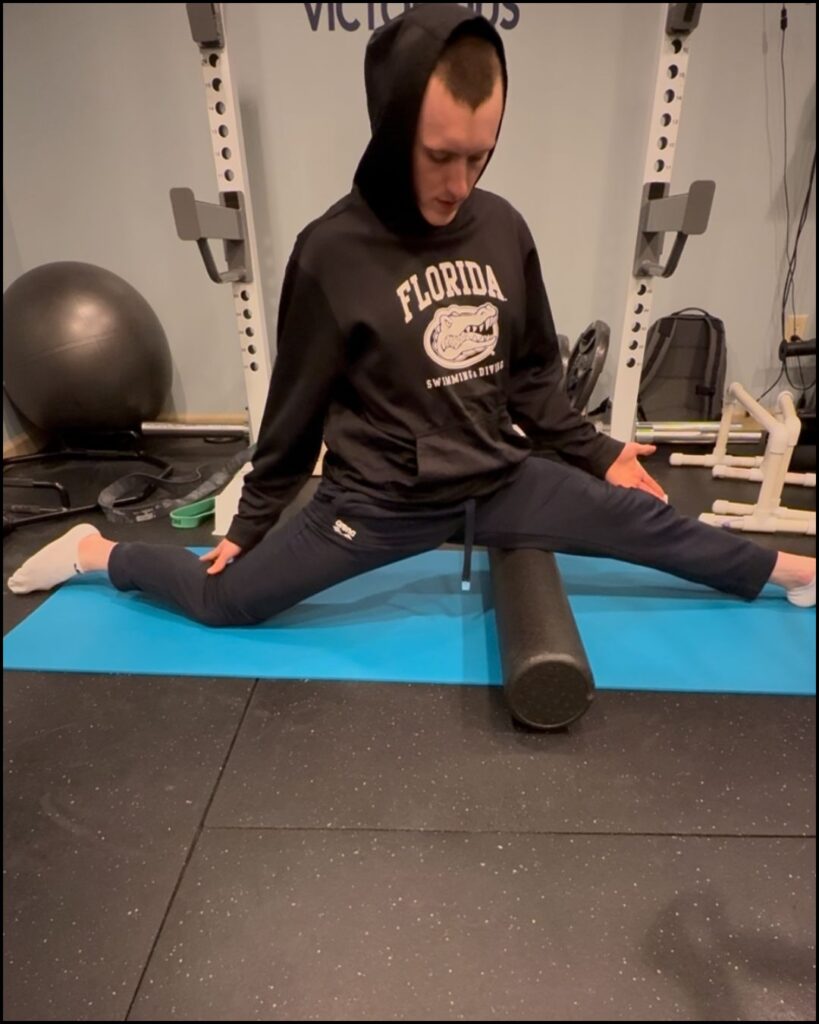
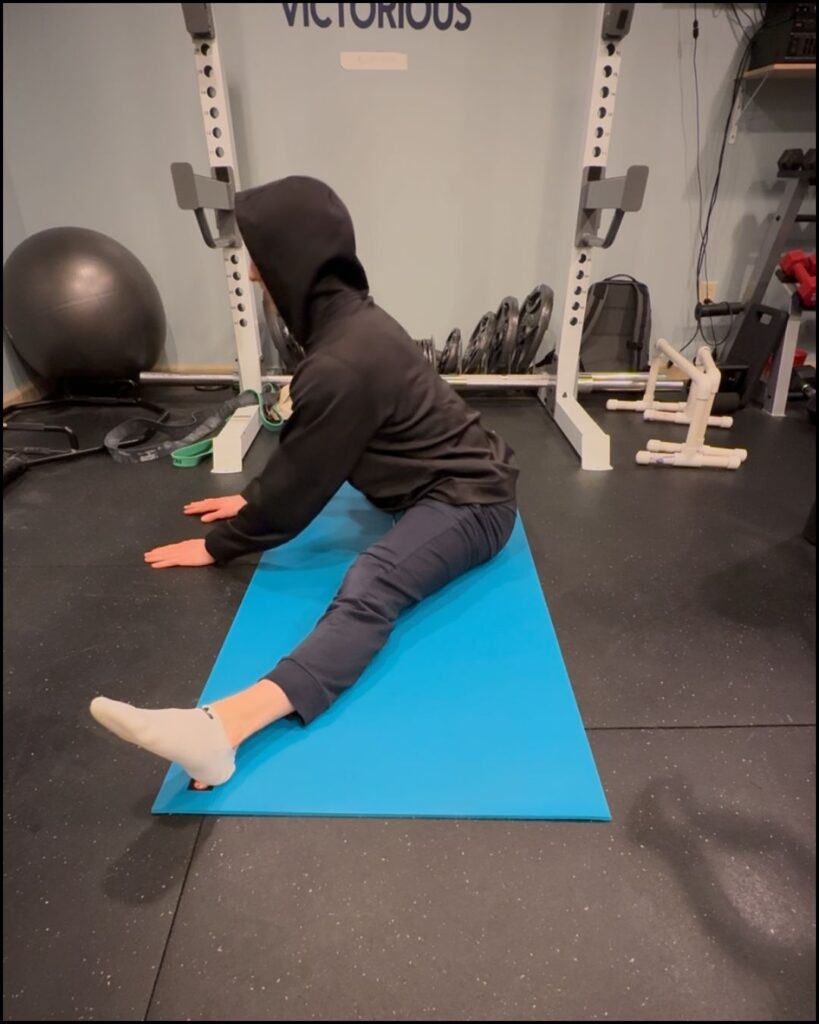
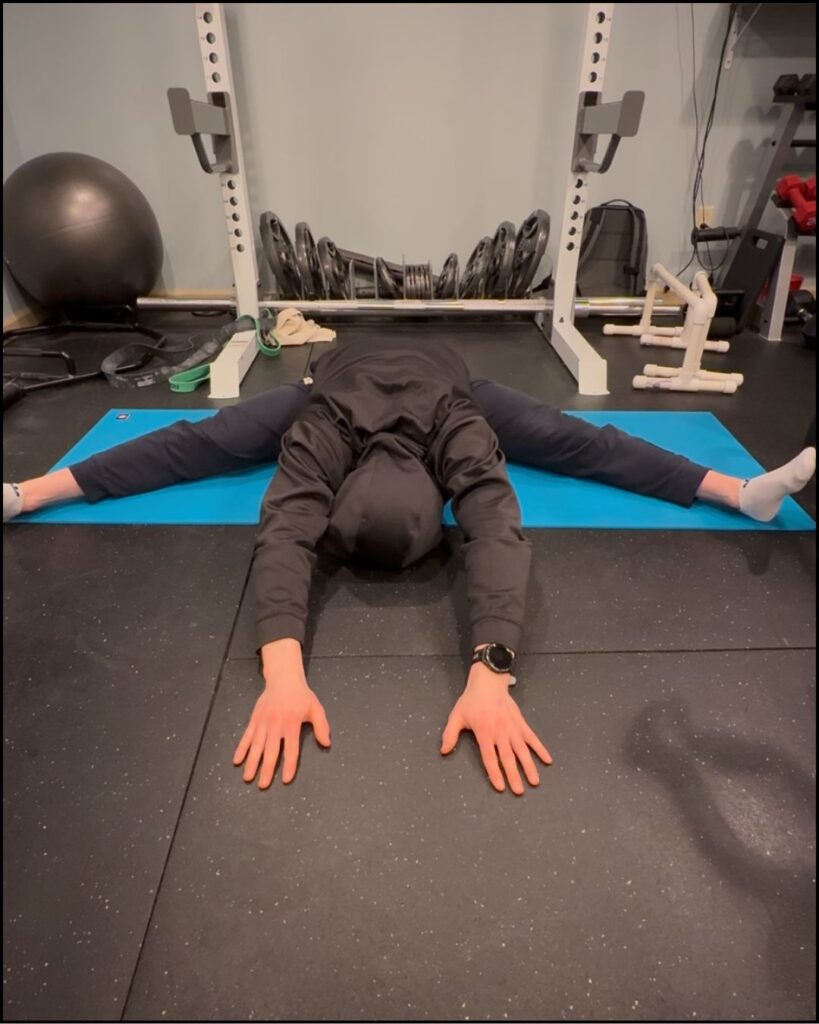
Straddle And Middle Split Progression
The straddle is a great way to slowly progress your adductor flexibility and prevent injuries of the groin.
Start with your legs comfortably apart because you don’t want to sacrifice nice back alignment in an effort to get your legs far apart.
Keep it light!
Now pull yourself forward with a flat back to deepen the stretch.
After a few deep breaths, go a little further. Breathing will really help you sink deeper.
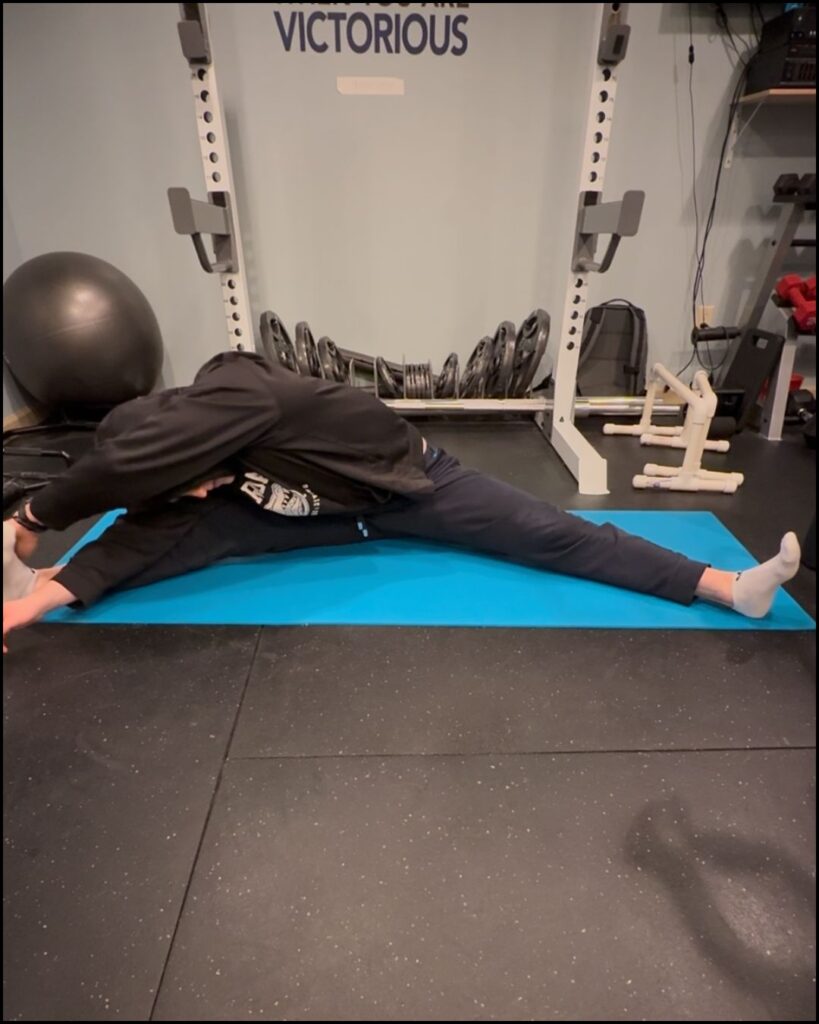
Middle Split From Above
This is a more intense version of the straddle, where you let gravity help you stretch.
It’s best done on a smooth surface so your feet can slide.
Use something to hold onto if you need support.
In the pictures, I’m using a foam roller, but you can use whatever you have at your disposal. (video below!)
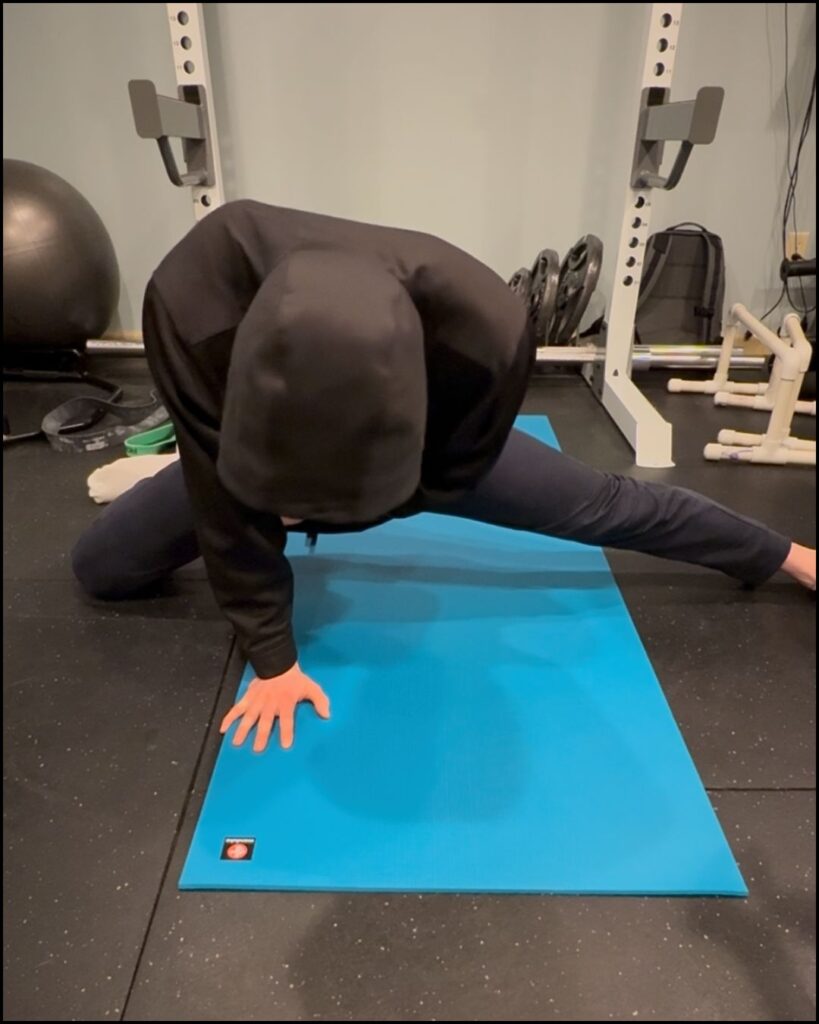
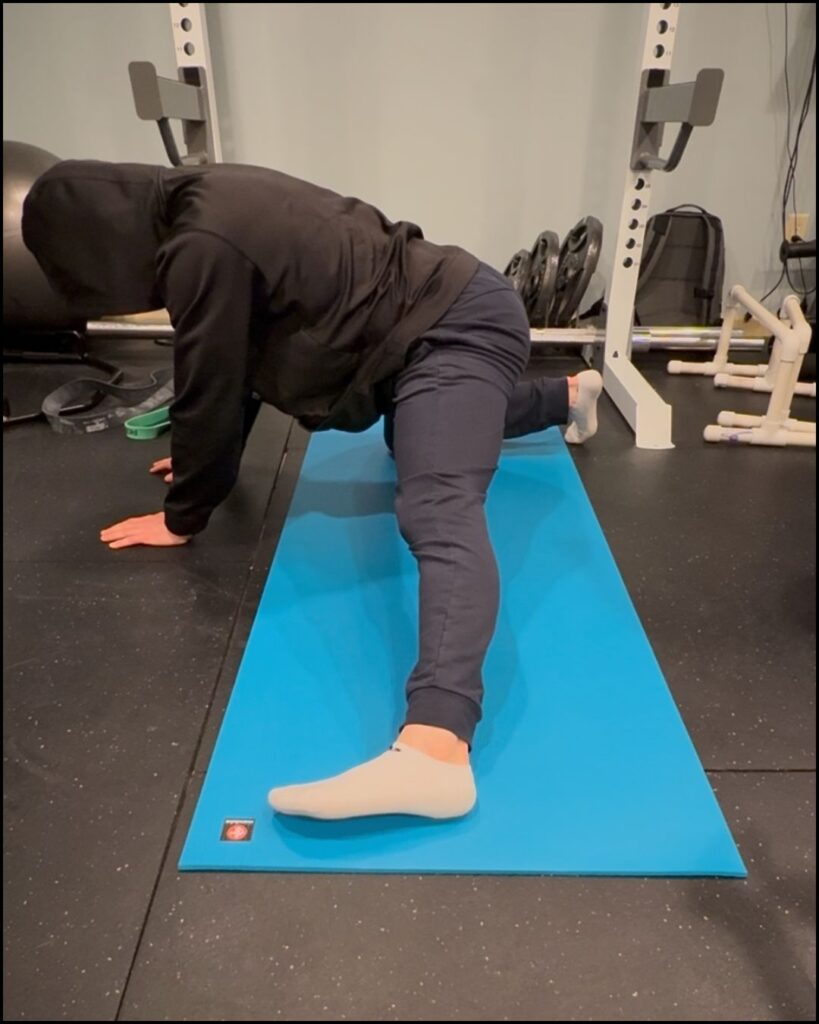
On All 3’s (one leg out)
Start on all fours, then stick one leg out to the side.
Try flexing your foot to stretch the back of your leg. Shift your hips from side to side or move your foot around to target different parts of the adductors along your leg.
It is a great feeling. And worth 3×30 seconds of your time 😉
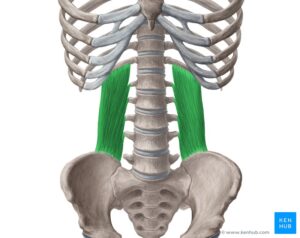
Stretching Your Quadratus Lumborum (lower back)
 When I was in high school, I was a competitive diver.
In 10th grade, I had extreme back spasms that I thought would end my diving career.
Then I met a Chiropractor/ART specialist, who taught me some of these stretches:
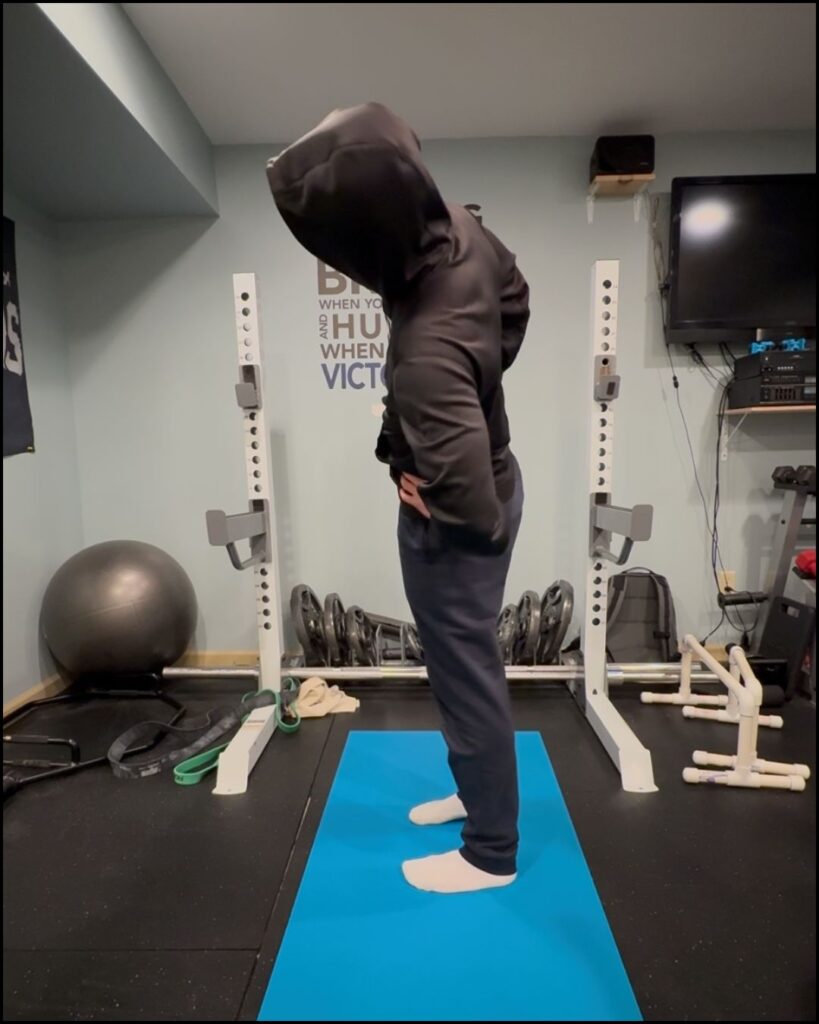
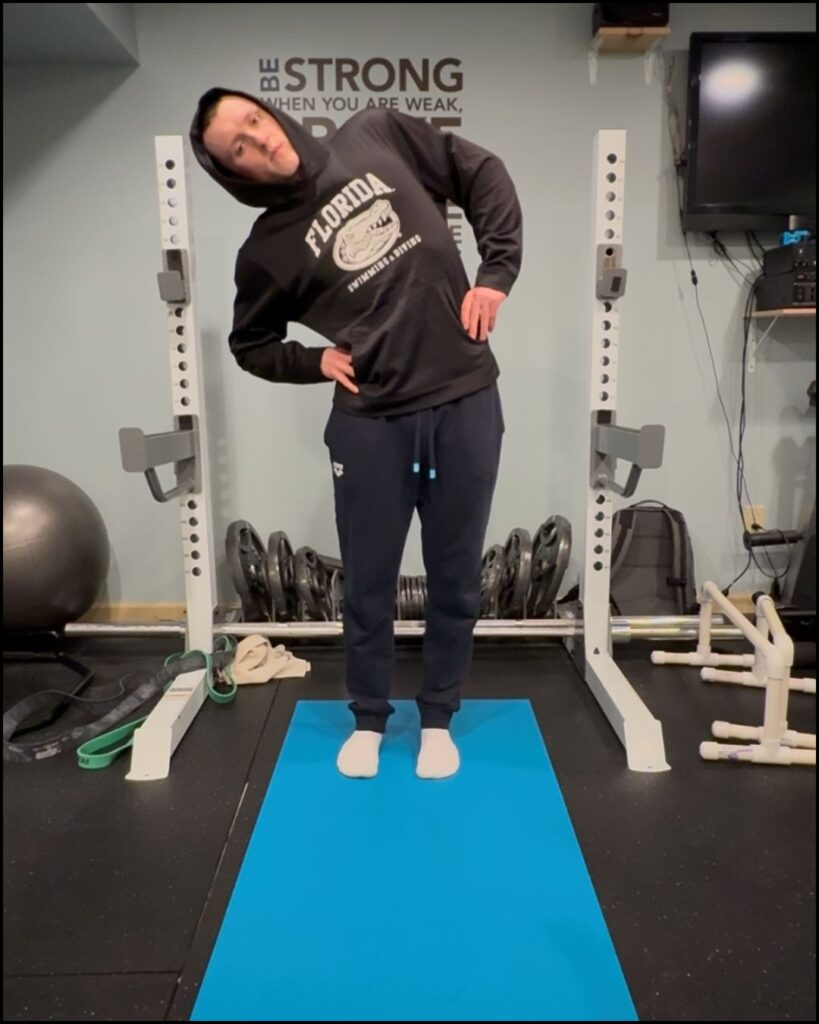
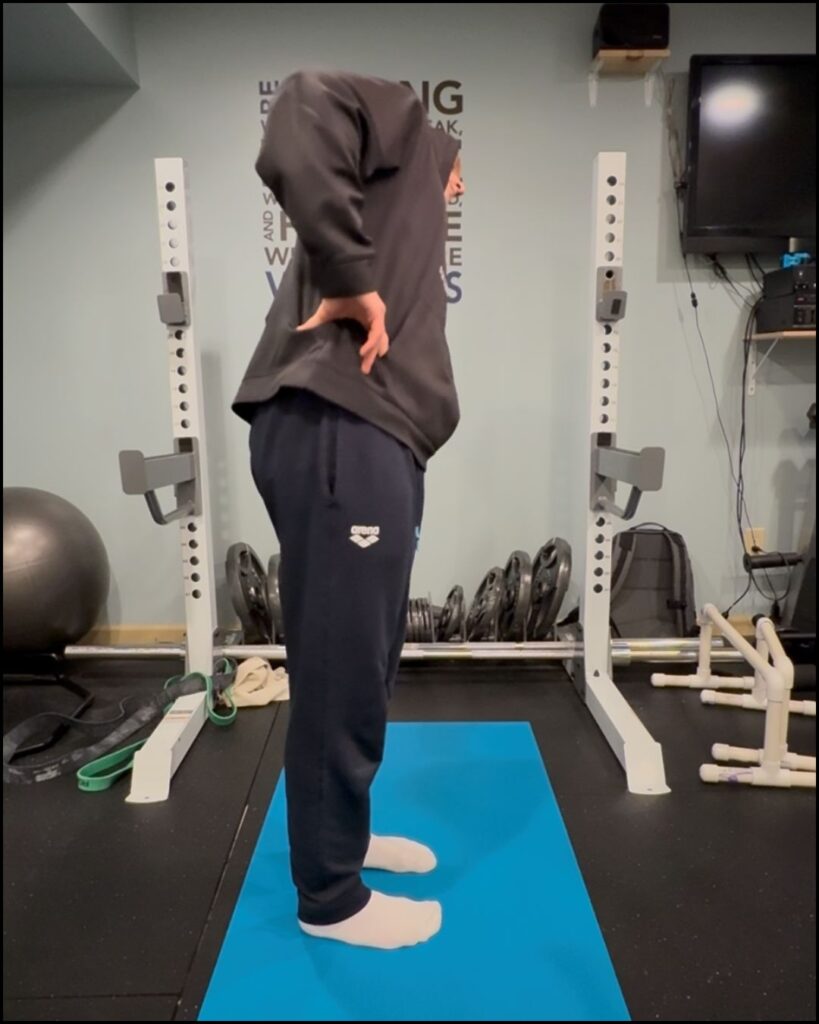
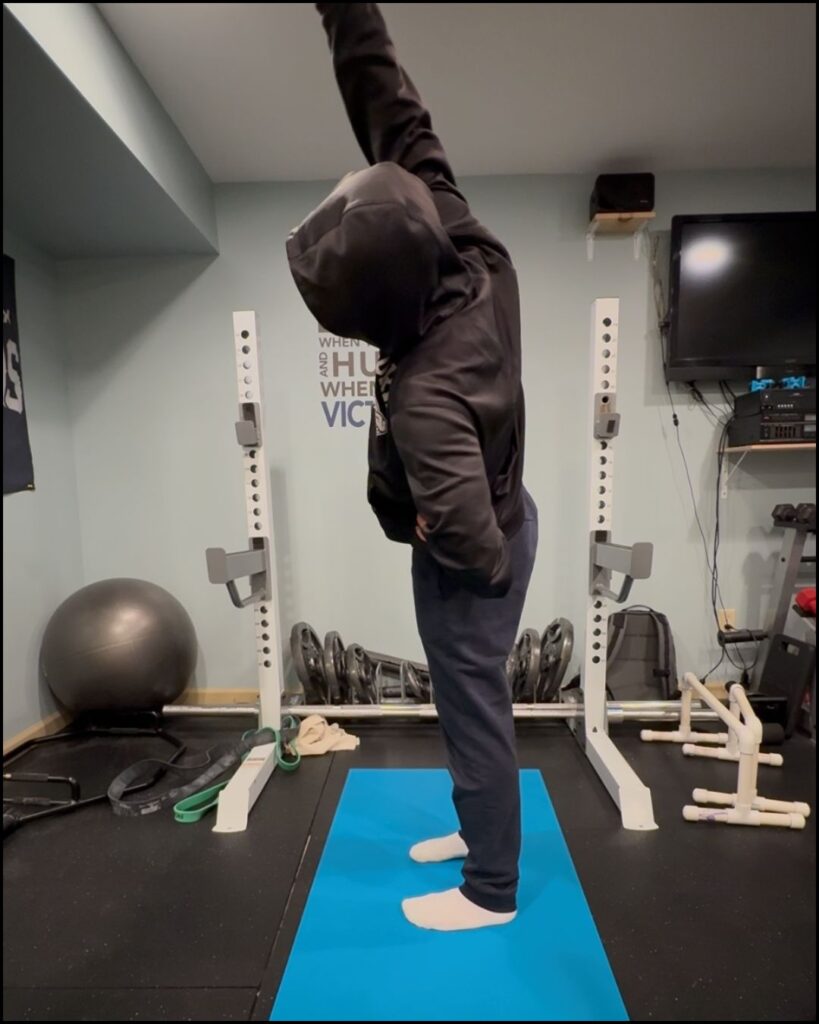
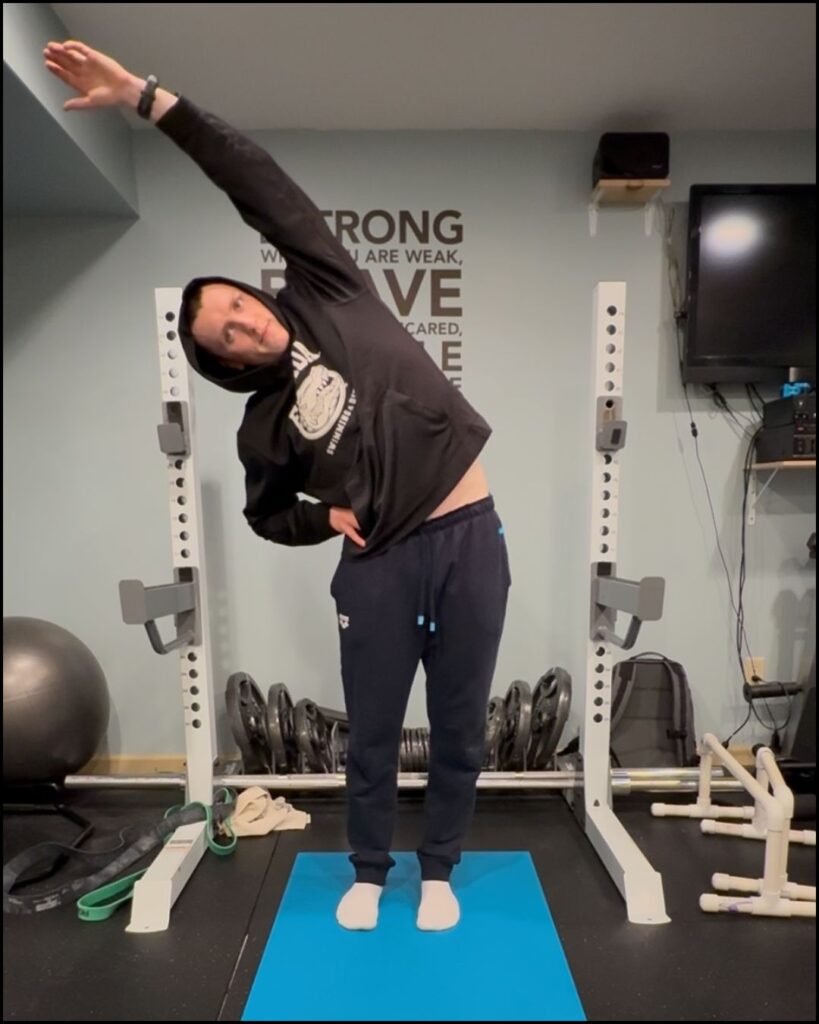
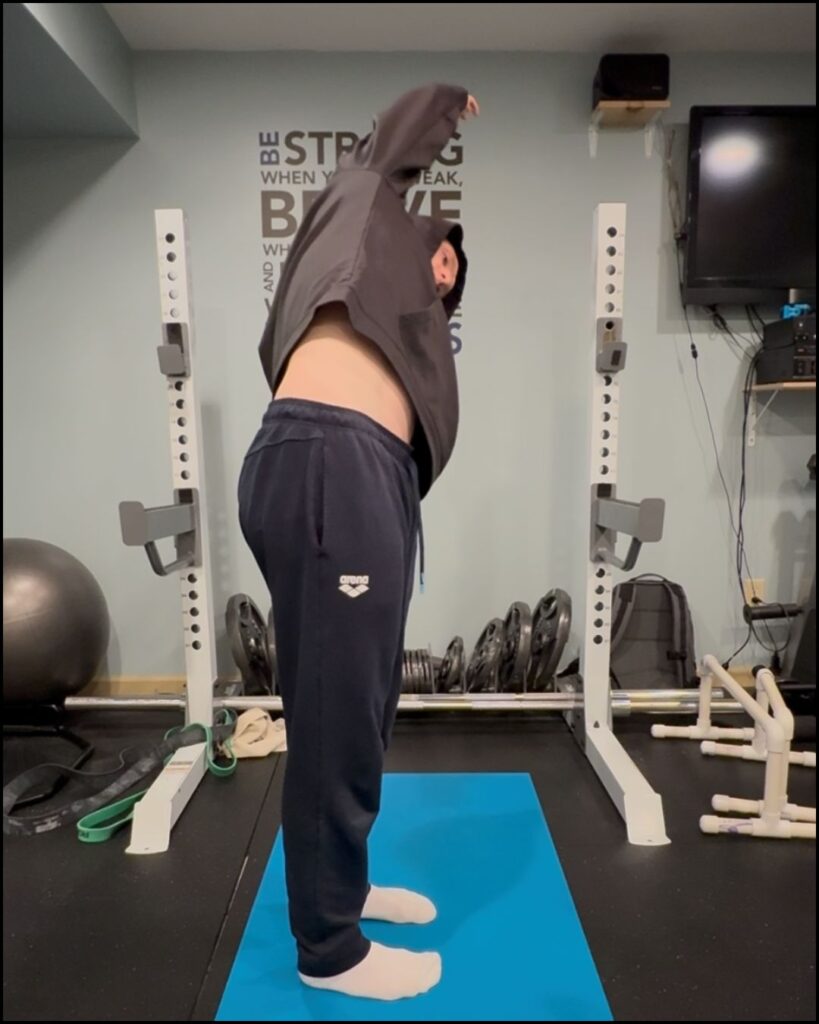
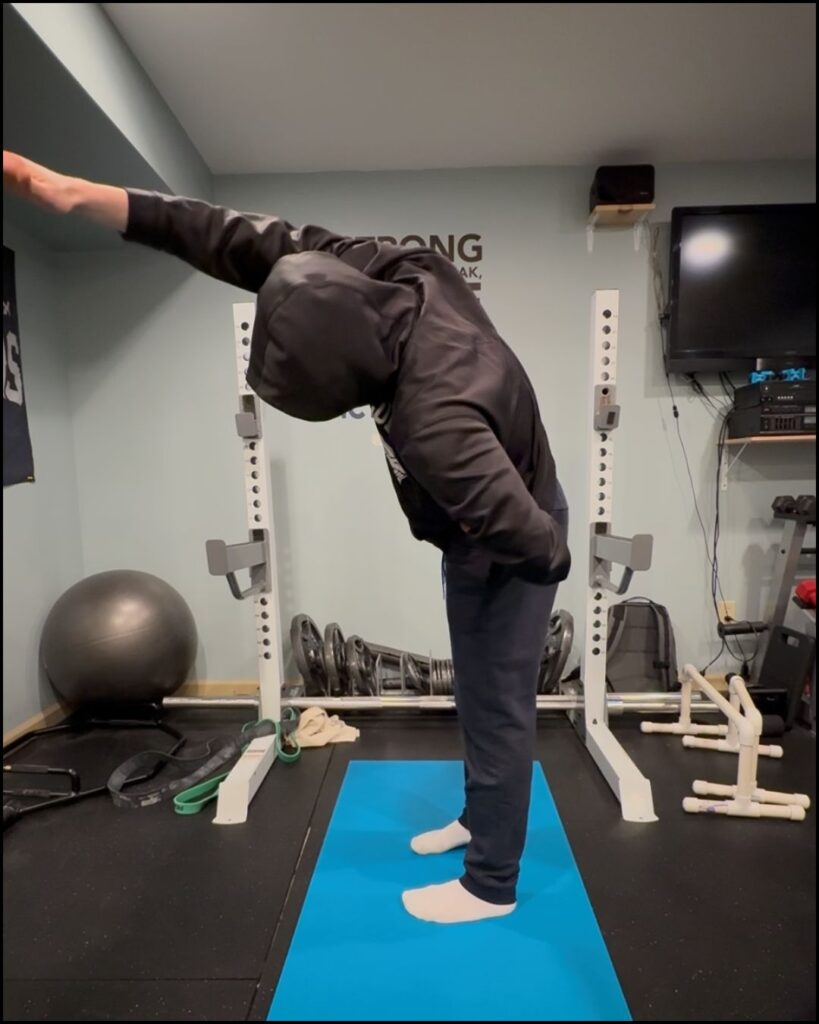
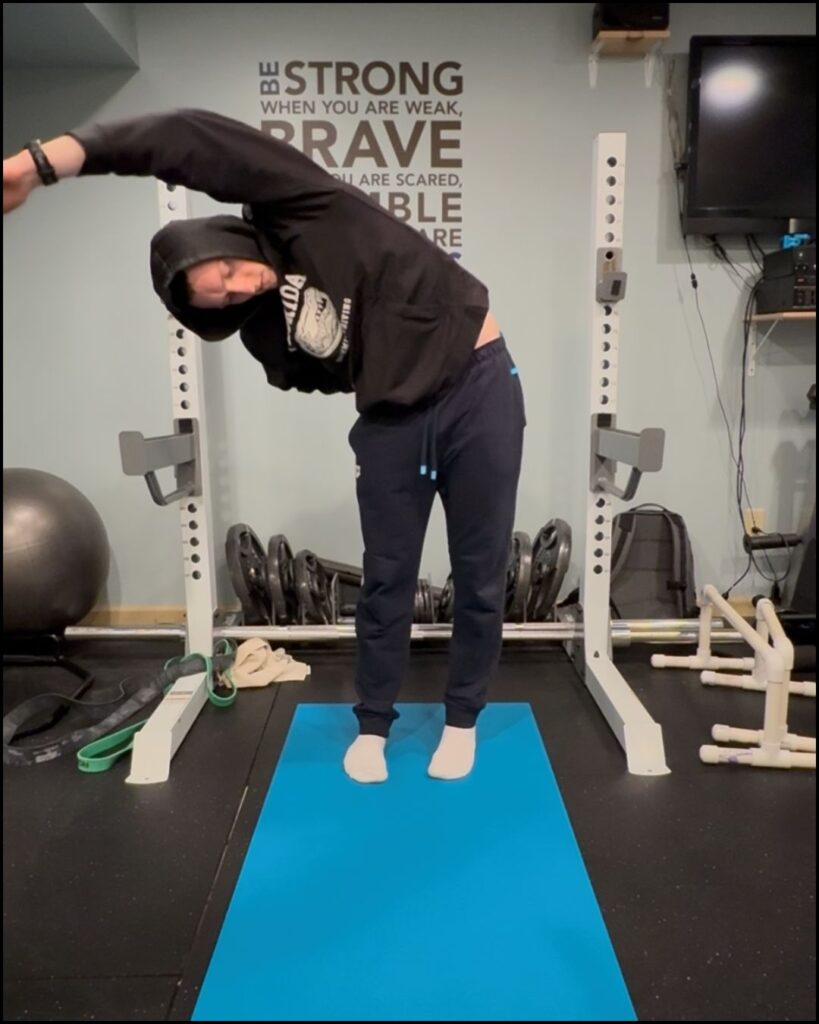
Standing Side Arch
Remember, good form is more important than stretching too far.
Here’s a video tutorial to watch!
Stand up straight and reach one arm overhead, stretching your body upward to the ceiling.
Focus on reaching up first without bending to the side.
Once you’ve reached as high as you can, add a gentle side bend to deepen the stretch.
You might wonder, “How does this help my low back pain?” Here’s the next step:
After stretching up and bending slightly to the side, move your shoulder on the stretched side forward. This shifts the stretch to reach along your side and into your back.
Sometimes I lift my leg on the stretched side slightly for an extra stretch.
When returning to a normal position, I use my arms to support my body and avoid putting extra strain on my back.
I like to place my hand on my hip for added support. Remember, this stretch should help, not hurt.
Pro Tip – Use a Thera-cane to release deep back knots!

Stretching Your Back
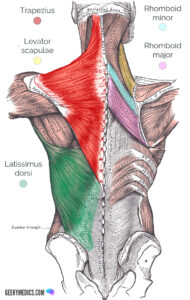 Take your back health to a new level with these stretches, from easy to advanced.
Back pain is something many people deal with, but it can be avoided and even fixed with dedication.
Here are some stretches to help you feel better now—and, with practice, for good!
Knee Hug Rotations
This stretch is great for warming up your back and hips.
Lie on your back and hug your knees into your body.
Give yourself light circles and rock back and forth.
From here, you can roll your knees over your head to stretch your back even more in plough stretch…
Plough Stretch
You can try bent knees and straight knees to find what you like best. You can also shift/roll from side to side to elongate different sides of your back.
Hang From Bar (traction)
A lot of people love this one.
Personally, I find it a little uncomfortable, but I know it can be great for realigning your spine and decompressing.
Hang from a pull-up bar with your feet off the ground and relax your core muscles to let your spine stretch.
You should feel a nice, gentle pull in your back—no pain, though!
Lat Stretch (self love lat massage)
Level 1
If you have a wall then you can do this stretch! Better than that, if you can grip something about waist high or use a table, you’ll be rockin and rollin.
All you have to do is bend forward like you’re making a 90 degree angle at your hips with one arm resting against a wall, on top of the table or gripping something.
Then, give yourself a gentle side bend. Make it more aggressive if you really want to deepen the stretch.
Level 2
This is a deep lat stretch.
It will only work if you have access to a squat rack though.
So, the next time you’re at the gym set up the squat rack like this… and slowly lower yourself until you’re in this perfectly curved position.
Pro Tip: Feel free to support yourself with your other arm.
Now you can turn and twist your body until you feel that perfect lat stretch all the way through your back!
Level 3 (bonus)
The self love lat massage you’ve been needing.
This is simple. Pinch your lat between your pointer finger and thumb starting a little bit below your scapula.
Pinch squeeze, release and regrip as much as you want.
Pro Tip: use a lotion or massage oil to get some sliding action after each grip.
Add lotion or massage oil for a smooth glide. For an extra stretch, squeeze your lat, then raise your arm to the side while holding the squeeze.
Stretching Your Abdominals
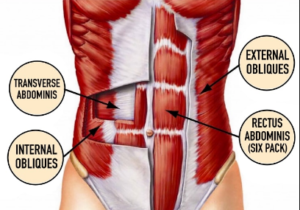 There are four abdominal stretches I’m going to give you and they get more intense with each level.
Video Below!
Upward Dog
Most people make a mistake by letting their legs rest on the ground.
For the best stretch, only your hands and the tops of your feet should touch the ground. Press your hands firmly down, straighten your arms, and lift your legs slightly for a full stretch.
(video below)
Partial Bridge
This is a great modification of the crazy back bending bridge you see gymnasts do (it’s also the final boss here in the abdominal section)
Lie on your back and bring your heels close to your butt so your knees form a 90-degree angle. Push your hips up, squeezing your glutes and hamstrings. You can use your arms for extra support if you need it!
You may not feel this one too much. That’s good… you can move on the the next one.
Lean Back Hang
I’ve never seen anybody talk about this stretch, it’s a little unorthodox, but it’s effective so I have to tell you about it.
Start by sitting on the edge of a couch or table with your legs draped off the side. Let your feet hang down, and take deep breaths as you relax your hip flexors and core.
Move your hips around until you find the most comfortable position for your back.
Then focus on deep breaths and pretend like your feet are being pulled to the ground.
This should fire up your hip flexors and you’ll feel it in your core.
Full Bridge
This is the ultimate abdominal stretch.
You can use a thera-ball or start from lying on your back. Press your feet into the ground and your hands beside your head, lift your hips, and press through your hands as much as you can.
As long as the stretch is felt, you’re doing it right.
Over time, you can think about bringing your feet in and pressing more through your arms to really lengthen out your extension!
Stretching Your Obliques
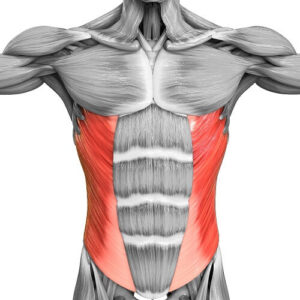
Side Dog (upward dog, but turned to the side)
This stretch is like upward dog, but it focuses on your side.
Start in Upward Dog, then shift to one side while rotating your body.
It’s okay to let your leg rest on the ground to help with balance.
Try to focus on the tightest part of your side, breathe deeply, and sink into the stretch. Then, switch sides!
Side Hang
This is similar to the lat stretch we did earlier, but focuses on stretching your side.
Stretching is all about connecting your mind to your body—try to focus on the muscles you want to lengthen because connecting your focus to a specific area of the stretch really helps!
You may feel this in your lats and side, but where your focus is will be what matters most.
Standing Side Bend
This is my favorite for stretching the side core and QL muscles!
Reach one hand up and over your head laterally, but focus on extending upwards rather than just bending to the side.
The more you reach up, the better the stretch!
Pro Tip: You can support yourself by placing your other hand on your hip.
Stretching Your Diaphragm
 You’ve probably never thought about stretching your diaphragm, but it’s the muscle you use the most for breathing!
It may feel strange at first, and people might give you funny looks if you do this at the gym, but it’s worth it.
Deep Breaths With Core Extension
This is a really weird stretch.
Take a deep breath in. Now, get even more air in with these extra breaths I like to call packing breaths.
It can be a little uncomfortable.
Once you get used to it, add core stretches to challenge your diaphragm and abdominal wall. It might burn, but it opens up your abdomen like no other stretch!
Deep Breaths With Rib Scoop
This stretch works differently and includes a hands-on technique.
- Exhale most of the air in your lungs.
- Relax your core.
- Use your fingers to gently scoop under your rib cage, starting at the bottom and moving upward.
The sequence of actions goes like this:
Exhale. Grip. Inhale, Release. Grip (regrip next spot)
Take your time! Slow and steady is key for this stretch and other trigger point techniques.
Pro Tip: This is easier to do on an empty stomach!
Stretching Your Intercostal Muscles
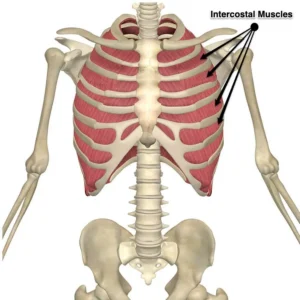
Seated Breath Twist
This explanation requires this video to really get it.
It is kind of advanced, but I believe in you!
Stretching Your Chest (pecs)
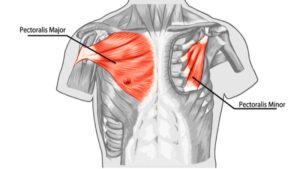
Door Way
Stand in a doorway with your hands on either side. Walk your hands up or down the doorway to change the stretch location slightly.
Step forward and straighten your arms to feel the stretch through your arms and chest.
Play around with the position of your arms and you can do head circles to get different tissues better.
Arm Bent Pec Stretch
Stand near a wall or doorway with one arm bent at a 90-degree angle (like a goalpost).
Place your forearm against the wall.
Slowly turn your body away from your arm until you feel a stretch in your chest, but make sure you are engaging your core so your body is rigid!
Pro tip: Keep your shoulders down and relaxed for the best stretch.
Straight Arm Pec Stretch
This is similar to the bent-arm stretch but with your arm straight.
Place your palm flat against the wall and straighten your arm. Then, gently turn your body away from the wall until you feel the stretch across your chest.
Feel free to place your palm higher and lower on the wall to stretch different fibers. Find your sweet spot.
Arms Above Head On Wall
Stand facing a wall with your feet shoulder-width apart. Place your hands high on the wall, palms flat.
Lean your chest toward the wall and step your feet back as needed.
Make sure you keep your arms extended and head in a neutral position.
You can bend your knees slightly to go deeper into the stretch. This stretch focuses on opening your upper chest, but if your shoulders are tight, you might feel it there too.
That’s okay! It works in both areas at the same time.
If you feel it way more in your shoulders, be sure to check out the shoulder stretch section below!
Stretching Your Shoulders
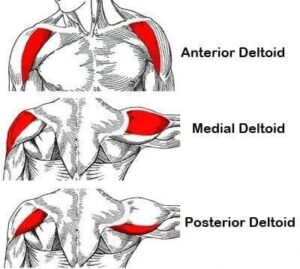 Shoulders often get overlooked, but whenever somebody does this set of stretches, they feel incredible afterwards!
Let’s dive in:
Arms Above Head On Wall
- Place your hands on a wall at chest level. You can keep them close together or farther apart—try both to see which feels better.
- Step back with your feet and bend forward at the hips.
- Pull your shoulder blades down and press your chest toward the floor.
- Keep your shoulders engaged (shoulder blades down) to avoid overextending your shoulders, and make sure the stretch is focused on the right muscles fibers.
Hand Behind Head
The basic way to do this is to stand up and put one arm behind your head by reaching over the top and reach for the back of your neck.
At the same time use your other hand to pull your elbow over and down.
You can deepen this stretch by actively resisting the stretch for 5 seconds, then relaxing the stretched arm as you pull deeper into the stretch.
You can improve this even further by adding this tricep stretch to the previous “arms above head on wall” move. It looks like this.
Arm Across Body
Now that’s enough overhead stretches. You can get your lateral and posterior deltoid with the arm across the body stretch.
You’ve probably seen this or done this before as a kid.
Arms Behind Body Sitting Down (for anterior deltoid)
- Sit on the floor and place your arms behind your back using a bar to maintain your hand distance.
- You can keep your hands close to your midline for the best stretch in the front of your shoulders, but don’t force it.
- Be careful on slippery surfaces—don’t let your hands slide too far apart.
Partner Shoulder Stretches
If you know somebody with tight shoulders, or want to get a great stretch without much effort, get a partner and run through these stretches.
Over Head
Partner A sits on the ground with their arms above their head while Partner B stands behind them.
I find it most comfortable to sit on my heels. Criss Cross AppleSauce tends to not work, as the bottom person doesn’t get enough leverage.
You’ll see what I mean in a moment.
Partner B slides their arms down through the middle of partner A’s arms, wrapping around their back to use as leverage.
Slowly pull their arms backwards, using their body as leverage. Partner A should be focussed on engaging their core, so they don’t arch too much in their lower back.
See the difference?
Prisoner
The Prisoner stretch is similar to the Overhead partner stretch we just went over. The only difference is that your arms look like this instead.
And it isn’t about pulling Partner A’s arms back. It is all about pressing their elbows closer together. It doesn’t usually take much pressure to feel the stretch.
Behind The Back
This is the partner version of the Arms Behind Body Sitting Down stretch. Partner A sits down on the floor, while Partner B holds their wrists, as they extend Partner A’s arms back and up.
Stretching Your Rotator Cuff (internal & external rotation of arm)
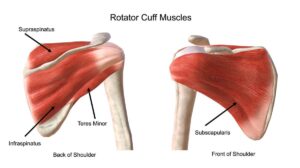
The Sleeper Stretch
The sleeper stretch is the best way to stretch the top rotator cuff muscles.
Don’t worry about getting your hand all the way to the ground—that’s not the goal.
Just focus on feeling a light stretch each time.
So:
- Lie on your side with your bottom arm extended out in front of you.
- Bend your legs to help with balance.
- Use your free hand to gently press your bottom arm toward the ground.
- Hold for 5 seconds, then actively resist by pushing back up against your hand for 5 seconds.
- Relax and let your arm sink deeper into the stretch.
Repeat this a few times on both arms, and you’ll feel your shoulders loosen up and relax.
Reverse Sleeper Stretch
It doesn’t take a rocket scientist to figure this one out!
Make sure you do a few rounds in the opposite direction to get all the rotator cuff muscles stretched. Take a look at the pictures to see what I mean!
Stretching Your Neck
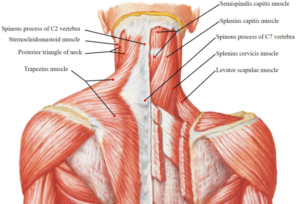 Many of us carry tension in our upper traps and neck, especially if we sit at a desk or have poor posture.
Let’s fix that with these simple stretches:
Neck Rolls
No, I’m not calling you fat. Neck rolls are an easy way to loosen up your neck. I like doing them before bed or in the morning to get moving.
- Roll your neck slowly in a circle.
- Start with small circles, and let them get bigger as you warm up.
- Don’t push too hard—just move gently to avoid straining your neck.
You’ll find that some positions are tighter than others. Hang out in that spot and let those muscle fibers lengthen a bit extra!
Side Hold With Hand
This stretch uses your hand to guide your head to the side:
- Gently pull your head toward one shoulder, like you’re trying to touch your ear to your shoulder.
- Once you feel the stretch, tilt your head slightly forward or backward to target different parts of your neck.
This will expose different parts of your neck to a higher tension point, rather than just stretching one lane of muscle fibers more than others
Anterior Neck Jaw Movements
This is a fun stretch for the front of your neck:
Turn your head slightly to the side. Then, open and close your jaw while your neck is fully stretched.
It feels great and helps loosen tight neck muscles and the muscles you use to chew as well.
Chin Levered Posterior Neck Stretch
This one is perfect for slouching phone users and desk workers out there.
When you look down too much, the muscles that are holding you up get really tight and tired, while at the same time, the muscles in the front of your neck begin to shorten and get weaker as a result.
They deserve a reboot:
- Place your right thumb and pointer finger under your left chin to support it, like a little beam.
- Tilt your head diagonally forward and to the left to stretch the back right side of your neck.
- Use your left hand to gently press on the back upper right side of your head, adding light pressure to deepen the stretch.
Your fingers under your chin provide leverage, and this feels amazing for tight neck muscles.
Take your time with these stretches, and your neck will feel much better!
Stretching Your Triceps
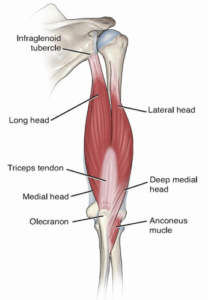 If I had to guess, you probably don’t stretch your triceps often.
It might not cause big problems, but if you’ve ever injured your tricep or do a lot of pushing exercises, you’ll feel tight over time.
Arm Behind Head
You may already know it, but read through this because the next stretch requires that you know how to do this one properly.
Start by reaching one arm behind your head and using your other hand to gently pull your elbow across the back of your head.
If this feels like a deep stretch, keep doing it daily to loosen up.
Once you stop feeling it in your triceps and more in your shoulders, you’re ready to move on to the next stretch.
Elbow On Wall With PNF Stretching
What’s PNF stretching?
PNF (Proprioceptive Neuromuscular Facilitation) is a fancy term for using a mix of muscle contractions and relaxation to stretch further.
It’s like tricking your body into being more flexible.
Now that you know what it is, here’s how to use it for your triceps:
- Lean against a wall with your elbow above your head and your hand behind your upper back.
- Use your other arm to press your hand into a deeper tricep stretch.
- Pretend you’re trying to straighten your arm by pushing against your hand or the wall, but keep it in place. Hold the tension for 5-10 seconds.
- Relax completely, and you’ll find you can stretch a little deeper.
Repeat this process a few times, going deeper after each round.
Over time, your body will get used to these deeper positions, making it easier to stretch in the future.
Stretching Your Biceps
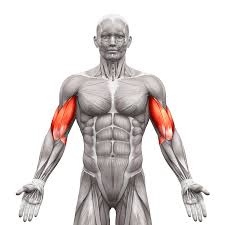 Biceps are difficult to isolate.
I’ll be honest, I neglect these guys a lot, but I’ve got an amazing active release technique for it.
Until that is finished, enjoy this pretty incredible arm opener.
Corner Room Bicep Opener
This stretch only needs a corner of a room where two walls meet at a 90-degree angle.
- Stand or sit facing away from the corner, and place your arms out behind you, parallel to the ground.
You might have to start wide and walk your fingers in toward the center. - Point your fingers toward the center of the corner.
- Slowly move your hands toward the center of the corner, or you can crawl them up or down the wall to adjust the stretch.
This stretch also works your forearms and shoulders. If your forearms or shoulders are tighter than your biceps, you might feel it there first.
But stick with it, and it will help your biceps too!
The only other stretch that I know of that can get the biceps pretty good are some of the shoulder stretches we already talked about.
That’s why massage and active release techniques matter too!
Stretching Your Forearms
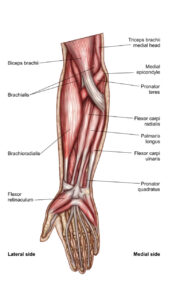 I was a competitive diver growing up and all through college. It came with plenty of injuries—like a bad back spasm in high school and lots of scrapes and bruises.
In college, I sprained my wrist twice during my sophomore year. It left my forearm super tight, so I’ve worked hard to find stretches that help loosen it up.
Wrist Curl Holds And Rolls
There are three ways to stretch your forearms using wrist curls:
- Palm Down Neutral
- Reverse Palm Down
- Palm Up
The pictures show what each looks like, but here’s how to make these stretches work for you:
Start gently—wrists are delicate and shouldn’t be forced into deep stretches quickly.
Try easing into the stretch by increasing the angle of your wrist or adding a little active movement (rolling your wrist through the stretch).
The palm up version is especially good at targeting tight spots in the forearms. You’ll be surprised how tight they can feel!
Check out this video on how they each look!
Wrist And Full Arm Traction Stretching
Resistance Band Version
- Set up a resistance band at an anchor point.
- Loop your hand through the band so it’s on the top of your hand (not on the underside of your wrist).
- When your hand is in place, step away from the anchor point to feel the stretch through your wrist, forearm, and full arm.
- Add neck circles or gently twist your arm to change the stretch.
Partner Version (wrist traction)
Partner A will get their wrist stretched and Partner B WIll help them in this scenario.
Both partner’s grab hands as if they are going to shake hands. Then, turn so partner A’s hand is palm down.
Partner B clamps down on Partner A’s hand to hold it in place.
Partner A turns 90 degrees to be perpendicular with Partner B and begins to gently lean away with straight arms.
Allow your body to relax for 5-10 seconds and the tissue all along your arm will stretch really well.
You might even feel a little wrist release too!
Thank You For Reading!
If you are reading this, I really appreciate you! Not a lot of people make it all the way to the end of an article this detailed. So I have something in the works for you.
I am in the process of creating a way for you to get direct access to me to get to the root of your issues.
So, bookmark this page and join my email list below for updates on this website!